
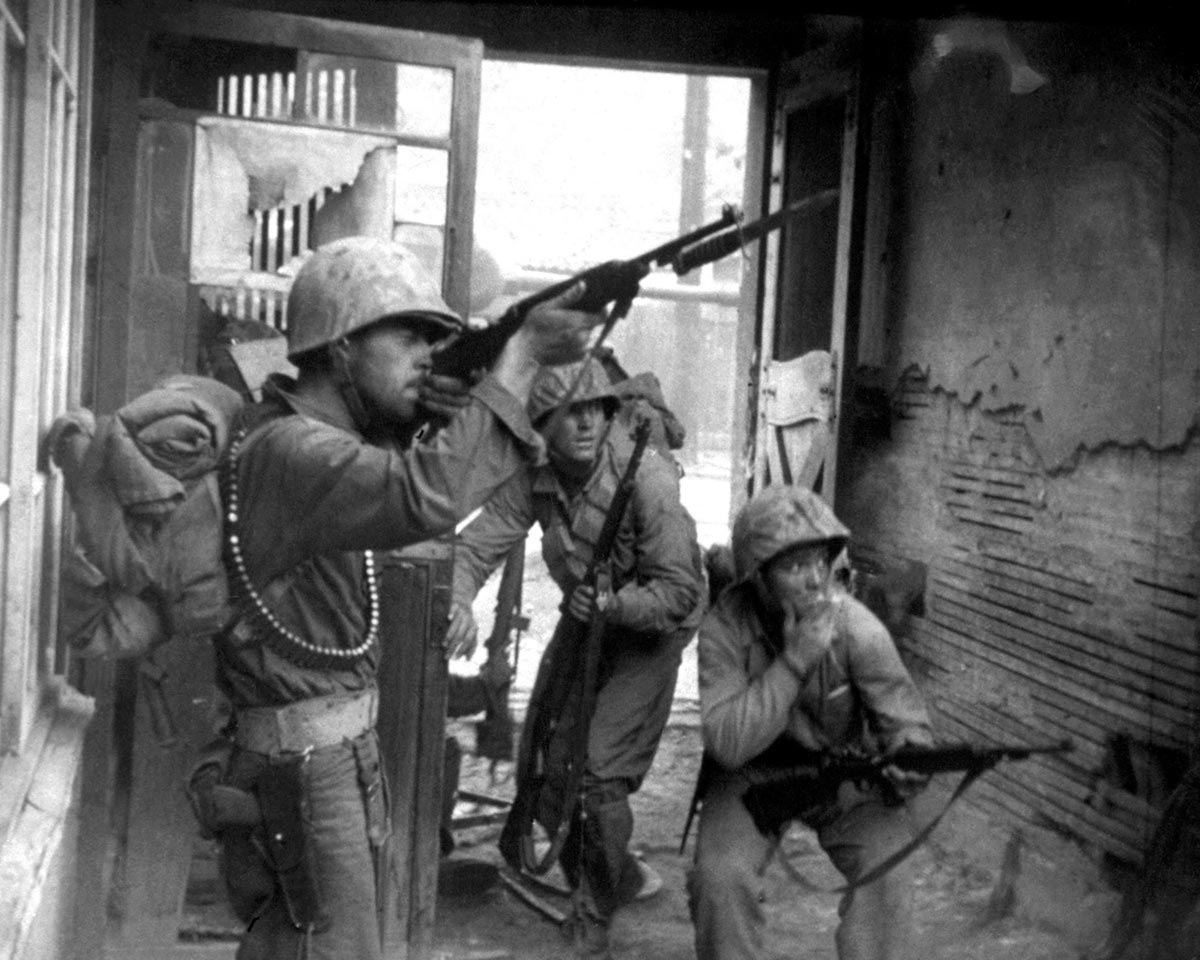
Today, we’re looking at a qualification test from the original 1942 field manual for the M1 Carbine. How difficult is it? What skills are required? And is there anything useful today’s shooters can learn from 1940’s marksmanship training?
Details are in the video below, or scroll down to read the full transcript.
Hey everybody, I am Chris Baker from LuckyGunner.com. How difficult is a World War II-era carbine qualification test? And is there anything useful we can learn from that period of marksmanship training?
A few days ago, I ran across a digital copy of the original field manual for the M1 Carbine. It’s a pretty comprehensive manual. It includes stuff like technical details, maintenance, and how to train recruits on the carbine.
But what was most interesting to me was the qualification course. That’s partly because I’m always looking for another excuse to shoot my M1 Carbine. But it’s also interesting to get a glimpse at the mindset that military leadership of the time had toward marksmanship training.
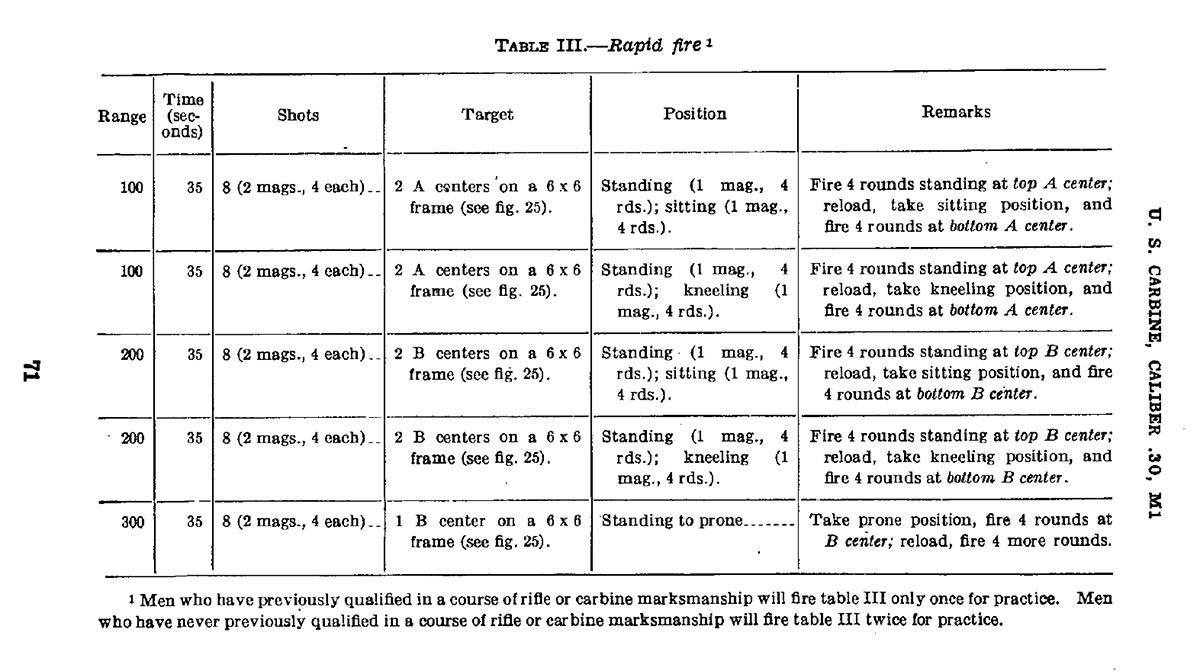
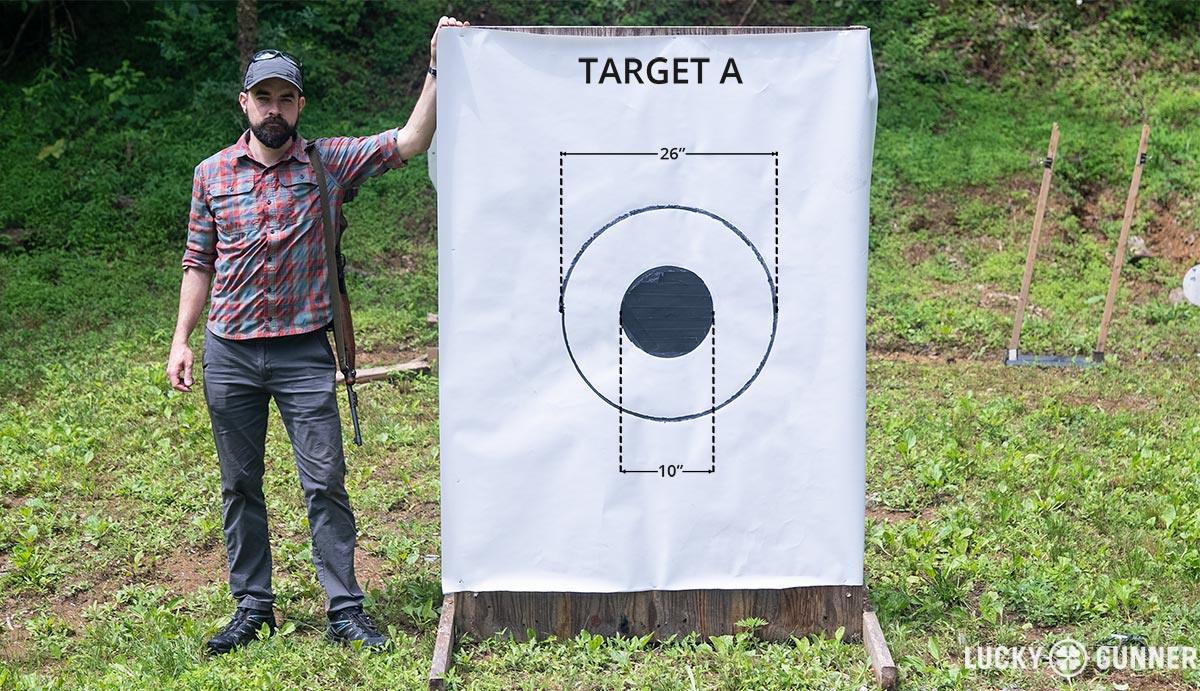
The carbine qual just requires 40 rounds in five stages fired at distances of 100, 200, and 300 yards. The targets they used at the time were pretty big. These are the homemade versions we put together based on the specs in the field manual. For Target A, which is used at 100 yards, you get a 26-inch ring worth four points and a 10-inch black bullseye worth five points.
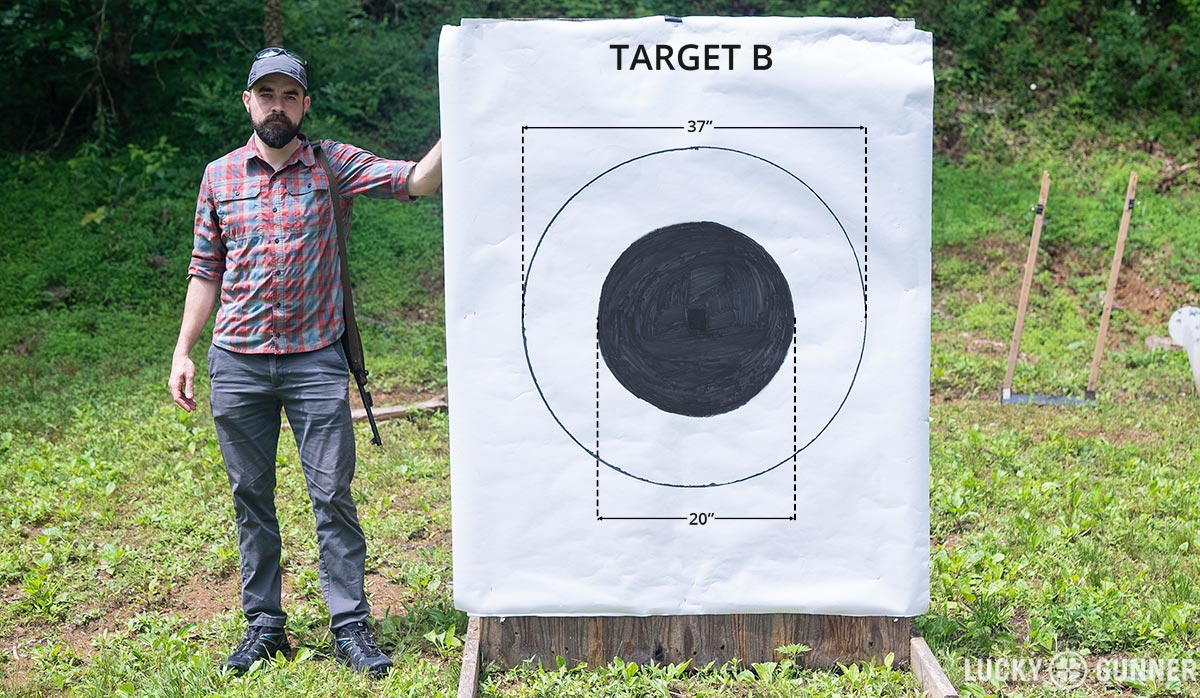
Target B is for 200 and 300 yards. The 4-ring for that one is 37 inches with a 20-inch bullseye for five points.
The maximum possible score is 200 points. 135 points earns you a Marksman classification and that’s the minimum required to pass the qualifier. 160 points makes you a Sharpshooter and 175 is an Expert.
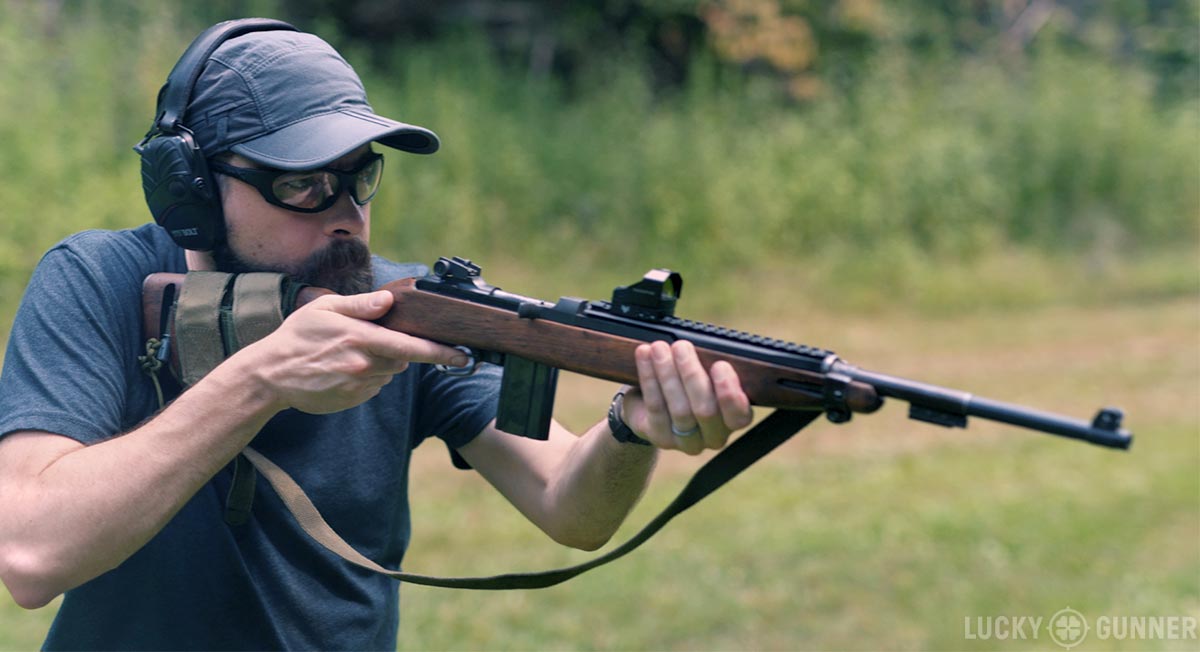
If you’ve seen my other M1 Carbine videos then you already know that I am a shameless heretic because I’ve mounted a red dot on my carbine. That makes it much quicker to get on target at close range, but in a test like this, it’s actually a handicap, which I’ll talk about more later.
This test was designed for the M1 Carbine, but there’s no reason you couldn’t shoot it with an AR, or really any other rifle or carbine. It’s a pretty decent test of fundamental marksmanship and gun handling skills, regardless of the gun used.
I’m not gonna make you watch me shoot the whole test because that would be boring. But here’s the course of fire:
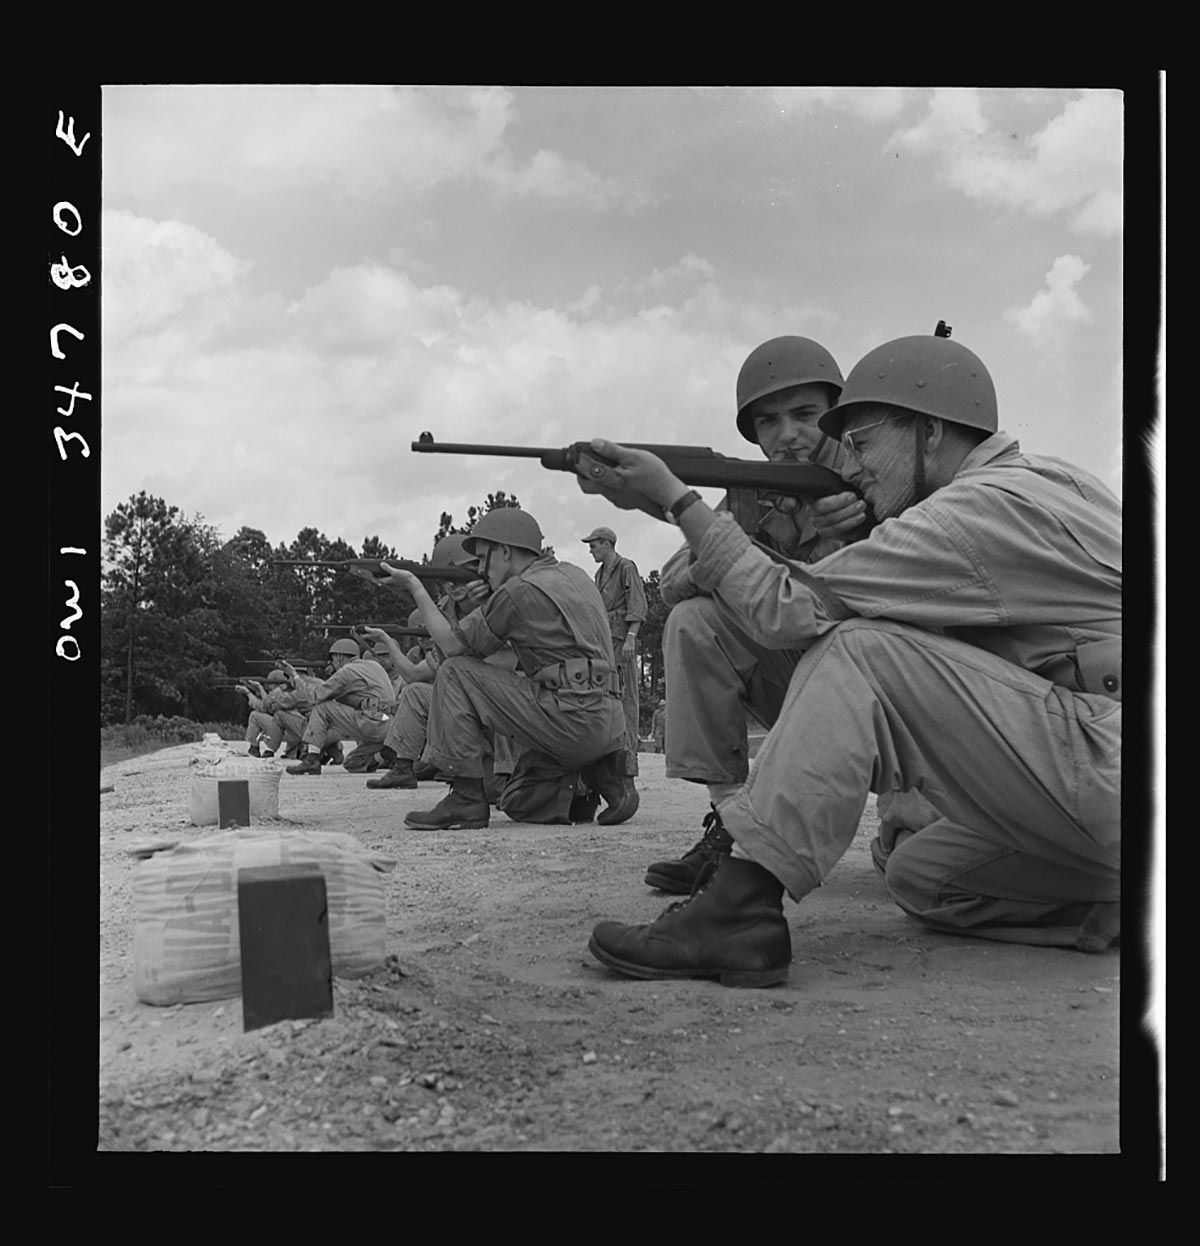
Each stage has a time limit of 35 seconds. You have two magazines loaded with four rounds each. Start with the gun loaded and positioned at what today we would call high ready.
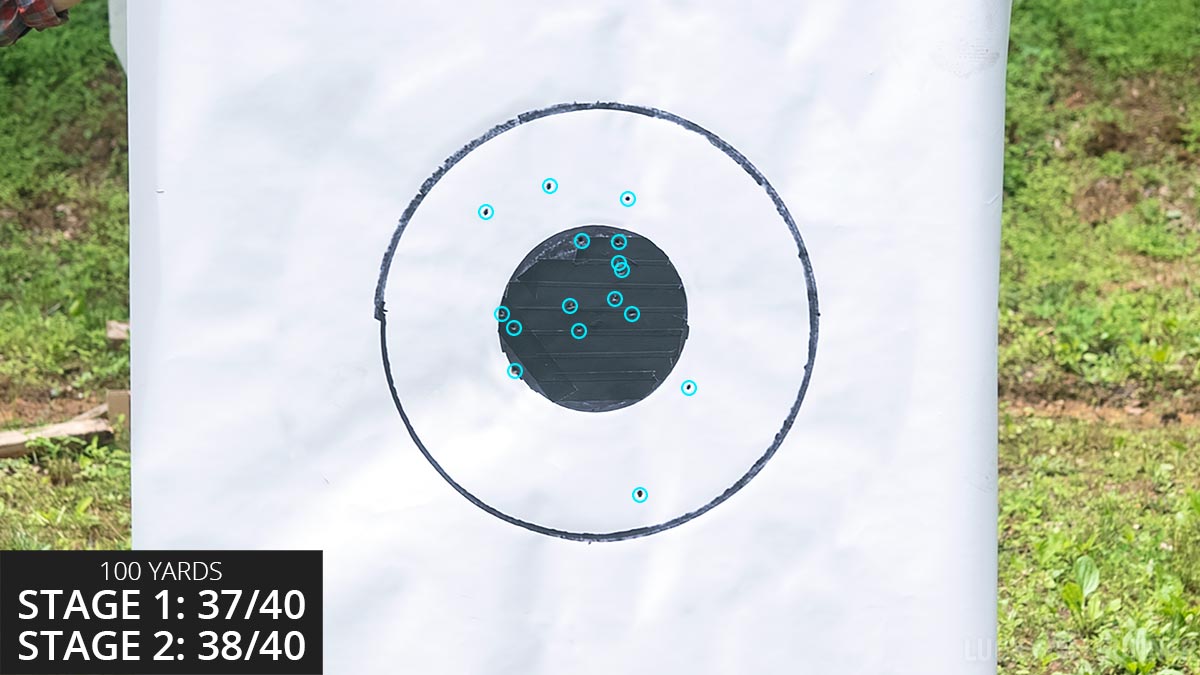
Stage 1 is at 100 yards. Fire four rounds from a standing position. Reload, switch to a sitting position and fire four more.
Stage 2 is identical except you switch to kneeling instead of sitting.
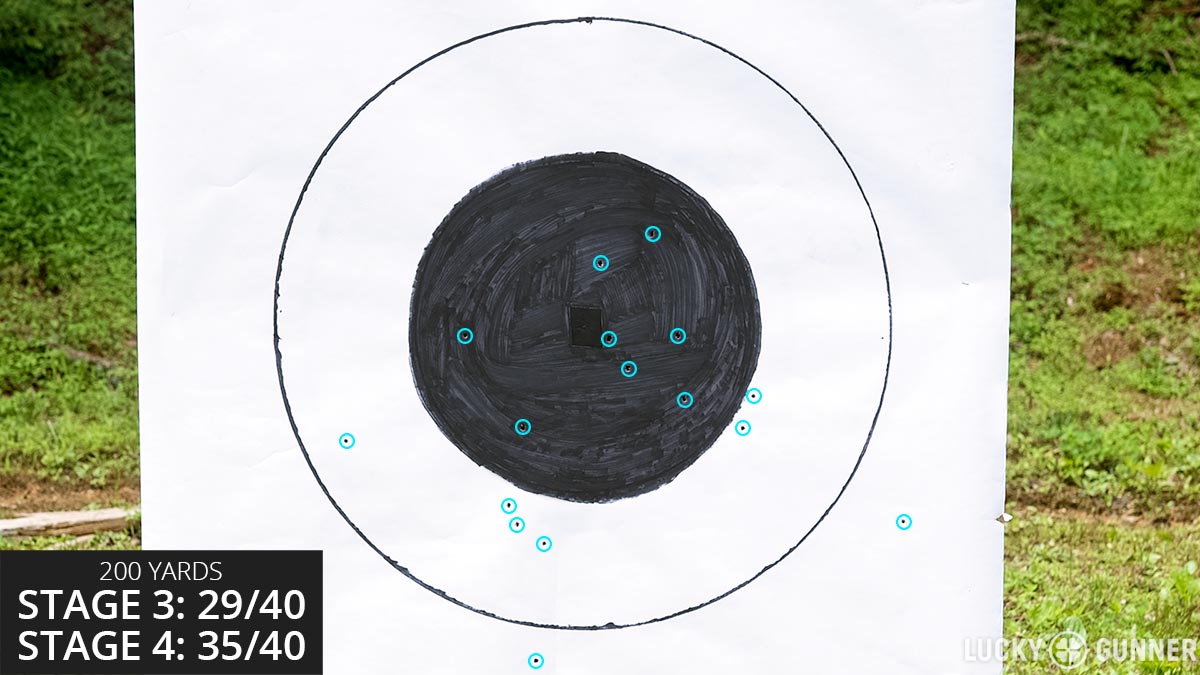
Stages 3 & 4 are just stages one and two repeated at 200 yards with the larger target. Four rounds standing, four rounds sitting, then four standing, four kneeling.
In the official military version of this test, they would have two targets mounted in opposite corners of a big 6’x6’ frame. They would start on one target and switch to the other after they changed shooting positions. We just used a single target to simplify the setup.
For Stage 5, you start at the standing position at 300 yards. On the signal, drop to prone and fire four shots, reload and fire four more.
To be completely honest, I was expecting to kinda breeze through this test without any trouble. Generally speaking, police and military qualification courses are intended for someone with minimal training, and oftentimes minimal interest, to demonstrate basic proficiency. They are not usually super challenging for experienced shooters.
I would not say this is a difficult test to pass, but getting that Expert rating of 175 is more difficult than I anticipated. When I tried it, my score was just 172. The 35 second time limit is pretty tight. And the accuracy standard is challenging with that time limit, despite the large targets.
For me, the 300-yard stage was especially tough because of the red dot sight. This optic mount does not allow co-witnessing of the iron sights. If it did, I could have used the handy 300-yard adjustment the M1 Carbine has on the rear aperture. Instead, I had to settle for aiming my dot about three feet high.
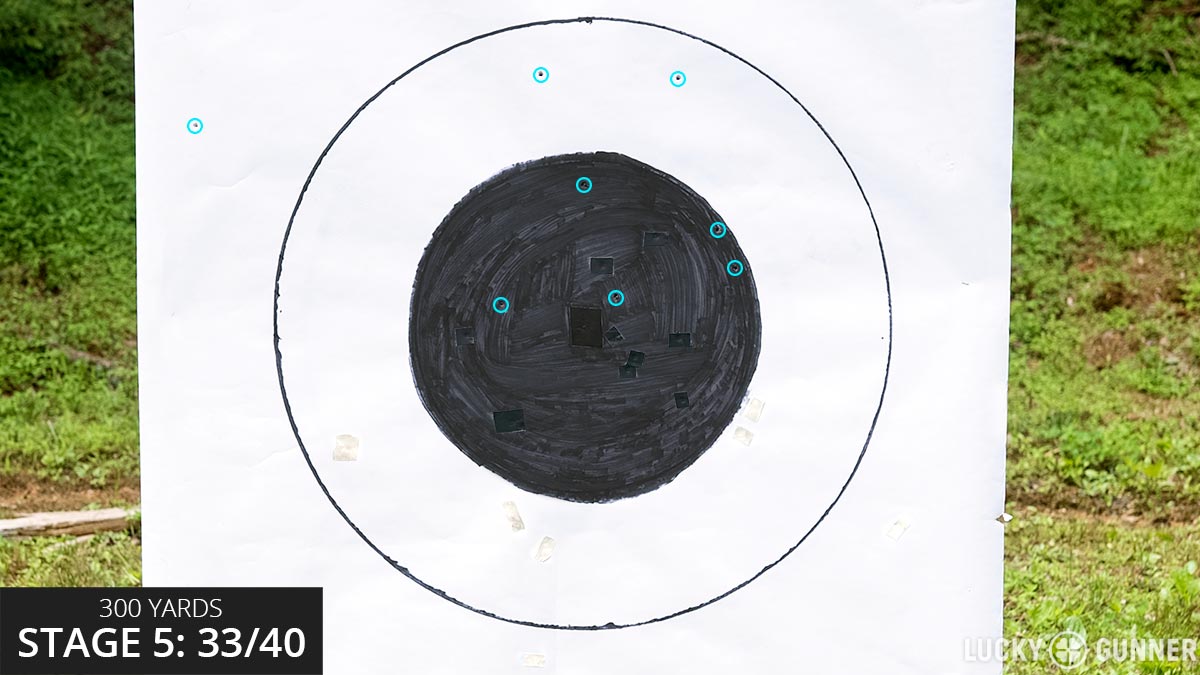
Apparently, my aim was just a little too high. And then I threw my last shot off to the left in a rush to beat the time limit – which I failed to do. So I lost five points on that shot either way.
I also found the standing portion at 200 yards to be a real challenge. I rarely practice standing at that range and had a really difficult time getting my wobble zone to settle into the black. So I missed two shots completely and got several more in the 4-ring.
I did much better on the 100-yard stages, but still dropped five points. And I’m pretty sure all of those were from the standing position as well.
This type of rifle qual might look familiar if you’ve ever done any NRA High Power matches or other Camp Perry style traditional rifle competition. If you’re under the age of 65, you probably have not. But you can also find these same techniques taught at rifle clinics put on by Project Appleseed or Revere’s Riders and some other training programs.
These disciplines focus on the traditional four basic rifle shooting positions – standing, kneeling, sitting, and prone. And that’s what this qual is meant to test: your ability to shoot from the four positions and to get into those positions quickly.
There’s a reason younger shooters don’t usually gravitate toward High Power matches and four-position rifle shooting in general. That’s because… it’s kinda boring. And it’s completely fine if that’s your thing and you enjoy it. I’m not trying to give you a hard time. But for a lot of us, compared to all the other activities we could be doing with modern semi-automatic rifles, sticking with just the same basic four positions at fixed known distances gets old after a while.
A lot of shooters today would also probably question the relevance of this kind of shooting, especially in the context of a military qualification test. If you were about to be shipped off to trudge through the jungles of the South Pacific or fight house to house in Europe, the stuff you’re going to need to do with your carbine might not look anything at all like that test.
Having said that, I think it’s a mistake to completely dismiss the four basic rifle shooting positions. They’re not just “lame stuff for Fudds because we know better now”. This way of shooting still works really well as a starting point for marksmanship fundamentals. It’s not the only way to build a foundation as a well-rounded rifle shooter, but it’s a pretty time-proven method.
The main thing you really learn with the four positions is how to take advantage of skeletal support rather than muscle tension to stabilize your aim. Once you know how to get your body into these stable positions, you can start modifying them based on the environment.
If you know what good, stable sitting and kneeling positions feel like, you can experiment with other positions to take advantage of improvised rests or to shoot around obstacles. Shooting with something like a V-TAC barricade can help you figure out which positions work and which ones don’t.
Personally, the very first formal firearms training I ever had was a one-day High Power rifle clinic with a loaner M1 Garand. I have zero interest in that style of competition, but as a novice shooter, it was an excellent introduction to rifle shooting. It gave me something really solid to work from for a long time.
If you’re only interested in shooting your rifle inside of 50 yards, you can probably skip the traditional four positions. They’re not going to teach you anything about home defense. You won’t learn a ton about recoil management or rapid target transitions. But the reverse is also true. If you spend all your time doing close range stuff, not much of that skill set carries over for shooting at 100 yards and beyond.
So, like always, the skills you learn should be based on what you want to do with the gun. If you enjoy the traditional rifle matches for their own sake, that’s great and you should do that. For everybody else, just keep in mind that you don’t have to learn the four positions and then park there forever. You can pick up some valuable knowledge and then build on it to get better at the kind of shooting that you want to do.
Okay guys, that’s it for now. Thank you for once again allowing me to indulge my fondness for the M1 Carbine. If you found any of that helpful, please be sure to like this video and subscribe to our channel and of course, the next time you need some ammo, be sure to get it from us with lightning fast shipping at LuckyGunner.com.