
Following our tutorial on how to mount an optic to your rifle, we’re moving on to how to sight in or zero your optic. This is a basic step-by-step walkthrough of the process that covers everything you need to know to get a good starting zero once your optic is mounted. The demo rifle is a Bravo Company AR-15 with a Swamp Fox Arrowhead 1-10×24 scope, but the instructions should work regardless of what rifle or optic you’re using.
Details in the video below, or scroll down to read the full transcript.
Hey everybody, Chris Baker here from LuckyGunner.com. Last time, I showed you how to mount an optic to your rifle. Today I’m showing you how to sight-in that optic.
Sighting it in just means that we’re going to make sure the point of aim is the same as our point of impact. That point is known as the zero, and so another name for the sighting-in process is zeroing the rifle.
The demo gun I’m using is the same as the one I had in the mounting video. It’s a Bravo Company AR-15 with a Swamp Fox Optics 1-10x Arrowhead scope. The process I’m about to show you should work even if you are using a different type of rifle or optic.
The Rough Zero
We’re going to start off by getting a rough zero. Before we make the fine adjustments, we want to get our point of impact somewhere within a few inches of our point of aim. Like everything I’m going to do today, there are several ways to accomplish this. I usually like to start sighting in with my target really close — about 10 or 15 yards. If we start with the target way out there at 100 yards, our bullets might not even be hitting paper and we won’t know which way to adjust the optic. At 10 yards, that’s not usually a problem.
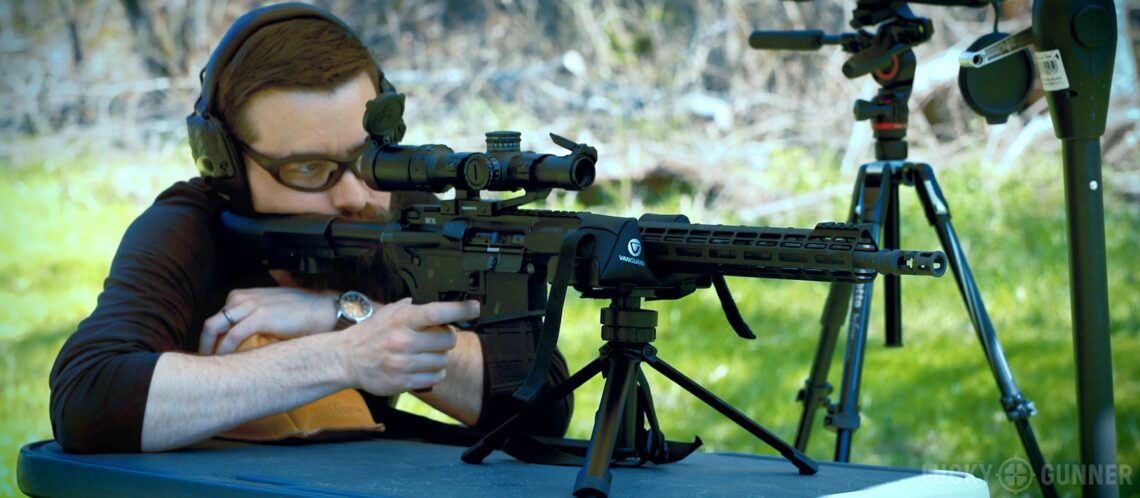
I’m going to be shooting from the bench since I’ve already got it set up. You can probably do this first part from a standing position if you want to since the target is so close.
For my aiming point, I’m just using a single black spacer on a big cardboard target.
At some shooting ranges, you’re only allowed to place your target at predetermined distances. You might not be able to set up a target at 10 yards. If, for example, you’ve got a minimum range of 50 or 100 yards, your best bet for this first step is to just use a really big target. Or you can set up a few targets side by side.
Another way to get a rough zero is to bore-sight the rifle. You can do that with a laser bore-sighting tool, but there’s an old-school way of doing it that doesn’t require one of those. It doesn’t work with all rifles, but you can do it with most bolt actions. It works with AR-15s if you remove the upper receiver from the lower first. Bore sighting is where you remove the bolt and look through the bore to find the target. Lock the rifle into that position the best you can and then adjust your scope so that the crosshairs are also lined up with the target.
Sometimes I’ll do this with a bolt action rifle, since it’s usually really easy to remove the bolt. The hardest part is keeping the rifle still while you adjust the scope. Bore-sighting is much easier with a rifle vise like the one I used on our work bench in the last video. A bipod also helps if you don’t have a vise.
When you’re doing the rough zero, you don’t have to use your good ammo. We’re going to do our final sighting in with our hunting load, match ammo, or self-defense load — whatever load we want the rifle to be set up for. Since we’re just trying to get in the general vicinity of a zero right now, we can use our everyday range ammo.
Today, I’m using some Magtech 55-grain FMJ for the rough zero. For my final zero, I’ve got a few rounds of Black Hills 77-grain OTM that I’ve been carefully rationing for a while.
For the close-up target, I’m going to adjust my optic all the way down to the lowest magnification setting. In this case, that’s 1x. Then I’ll just shoot a three-round group. This can be a quick group. The holes don’t have to all be touching. It’s a rough zero, so don’t over-think it at this point.
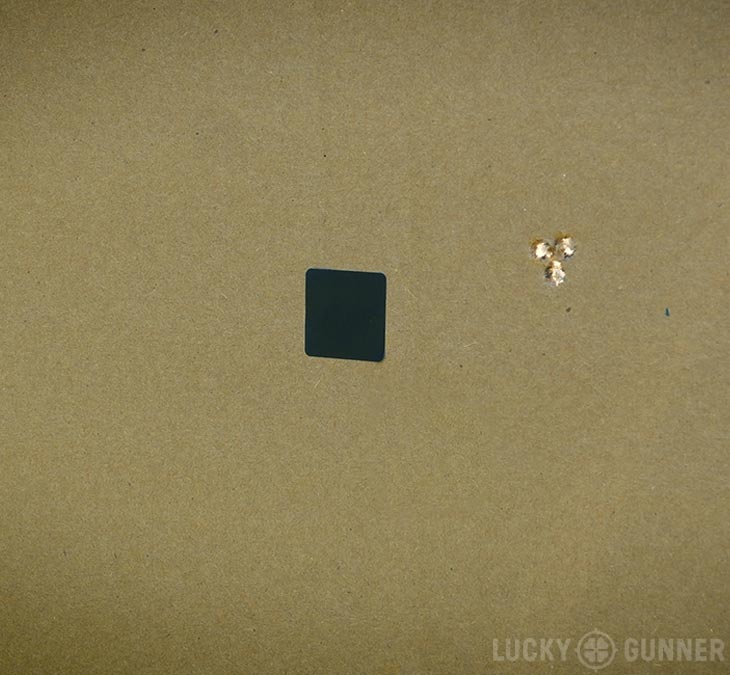
Okay, looks like I’m high and to the right.
The reason I do three rounds is because I just mounted this optic. If I can’t get three rounds fairly close together at this distance, then it means something is probably loose and I need to go back and check my mount and all my screws. In this case, I’ve got a pretty decent group here, so I can start making my first adjustments to the optic.
The left to right horizontal adjustment is called windage. The vertical adjustment is called elevation. With the rough zero, I want to get my windage pretty close to the middle. The elevation is going to change depending on how far out my target is. For that, I just want to get it kinda sorta close to the middle.
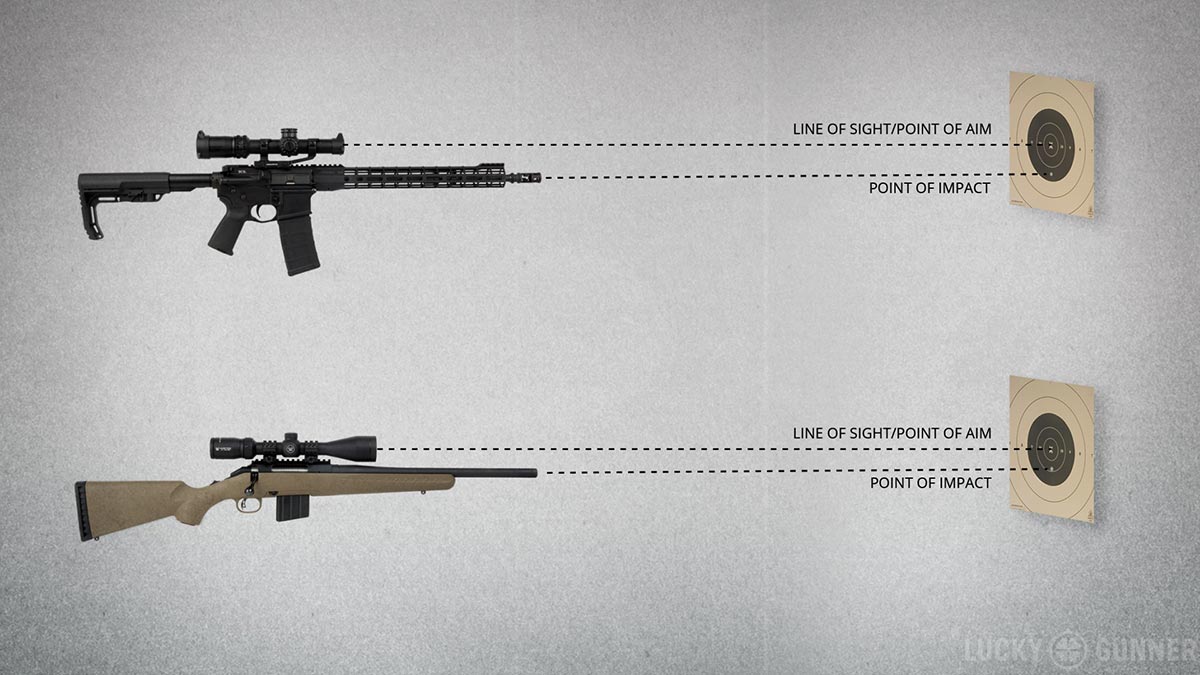
With an optic mounted to an AR-style rifle, the line of sight is well above the bore. So with ARs, when you’re up close at 10 yards, your point of aim is going to be a couple of inches above your point of impact. That is normal. For non-ARs where the optic is a little closer to the bore, you want a little less offset; maybe closer to an inch.
If your scope has capped adjustment turrets, go ahead and remove those and just leave them off until you’re totally done sighting in the gun. This optic has exposed turrets and it’s got this handy little feature where they won’t turn unless you pull up on the turret first. With most optics, the elevation adjustment is the knob on the top. The windage knob is on the right.
On some of the open emitter reflex sights, especially the compact pistol sights, you’ll have adjustment screws instead of knobs and they might not necessarily be on the top and the right.
If there’s a knob on the left side of the scope, that’s usually the brightness adjustment. On a really high power scope, this knob might instead be the parallax adjustment. I’m not going to cover parallax today, but if that’s something your scope has, you should read up on how to adjust it properly because it can make a big difference when you’re zeroing the gun.
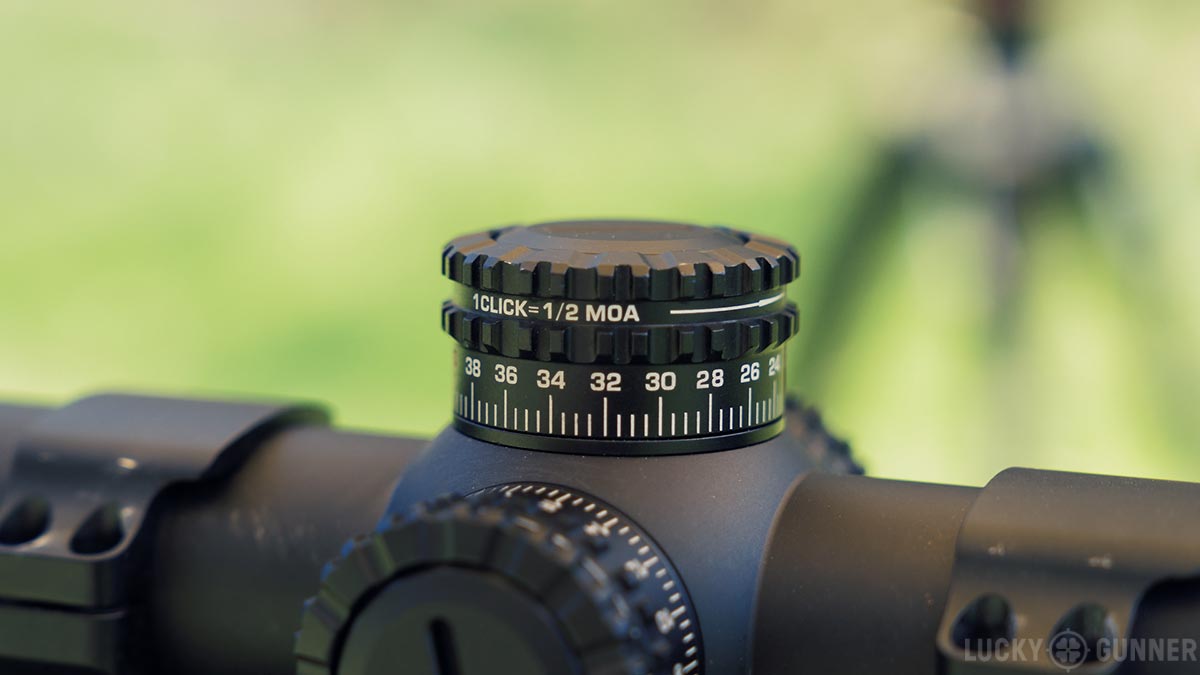
With most scopes, every click on the adjustment knobs corresponds to a certain amount of shift in your point of aim. This scope, for example, says 1 click=½ MOA. That’s one half a minute of angle which happens to translate to about a half inch at 100 yards. So if I needed to shift my point of impact to the right one inch on a target at 100 yards, I would turn my windage knob counterclockwise two clicks.
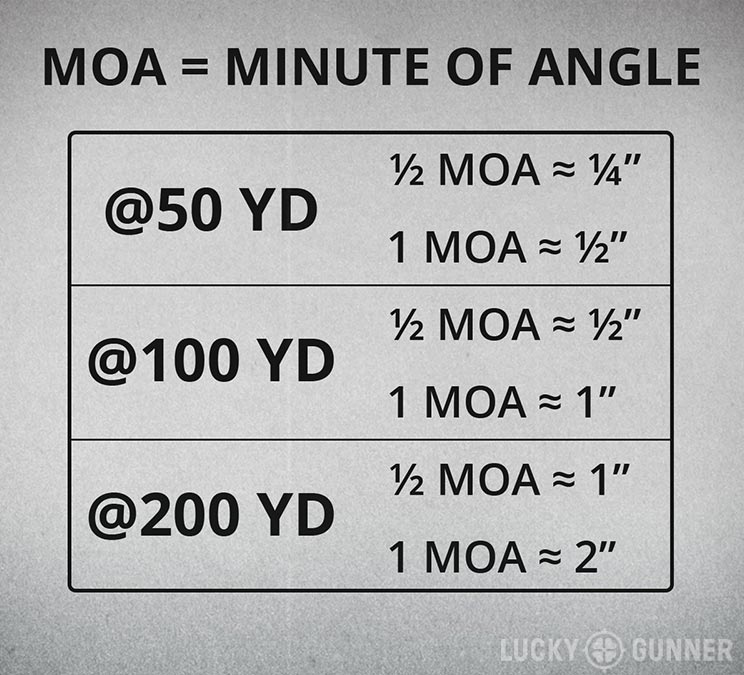
But here at 10 yards, each click is only 1/20 of an inch. I could go measure my group and then do the math to figure out how many clicks I need to move the bullet to the center. But that math almost never works out at this range. I’m just going to crank on it for a while and see what happens.
Now I’ll just put one more round down range to see where I am.
Okay, so I’m not going to mess with my elevation. That’s about where I want it to be. When we get out to 100, I’m going to want it to be right on the point of aim. But here, it’s lower and that’s what I’m looking for.
For the windage, it looks like I went a little over half the distance I need to go to get it centered. So I’m going to do a few more clicks left, maybe six or seven. Then I’ll fire one more round and if that’s pretty close to the middle, I’ll go ahead and move the target out to my full distance.
That looks pretty close. I’m not going to do any more with the rough zero. That’s about where I want it to be. I can move out to my full distance.
Full Distance Zero
So what distance should that be? Well, that depends. The simple answer is 100 yards and that’s what we’re going to use today. The complicated answer is that there are a lot of competing philosophies about what distance you should zero your rifle depending on the cartridge you’re shooting and the approximate range you expect to be using your rifle. That’s not something I can really get into today.
To keep things simple, I’m going to do a 100 yard initial sight-in. If I decide to zero for a different distance later on, that’s pretty easy to do if I already have my 100-yard zero set up. If you’re shooting a .22, you might want to use a 50-yard zero. For centerfire rifles, it’s hard to go wrong with 100 yards as a starting point.
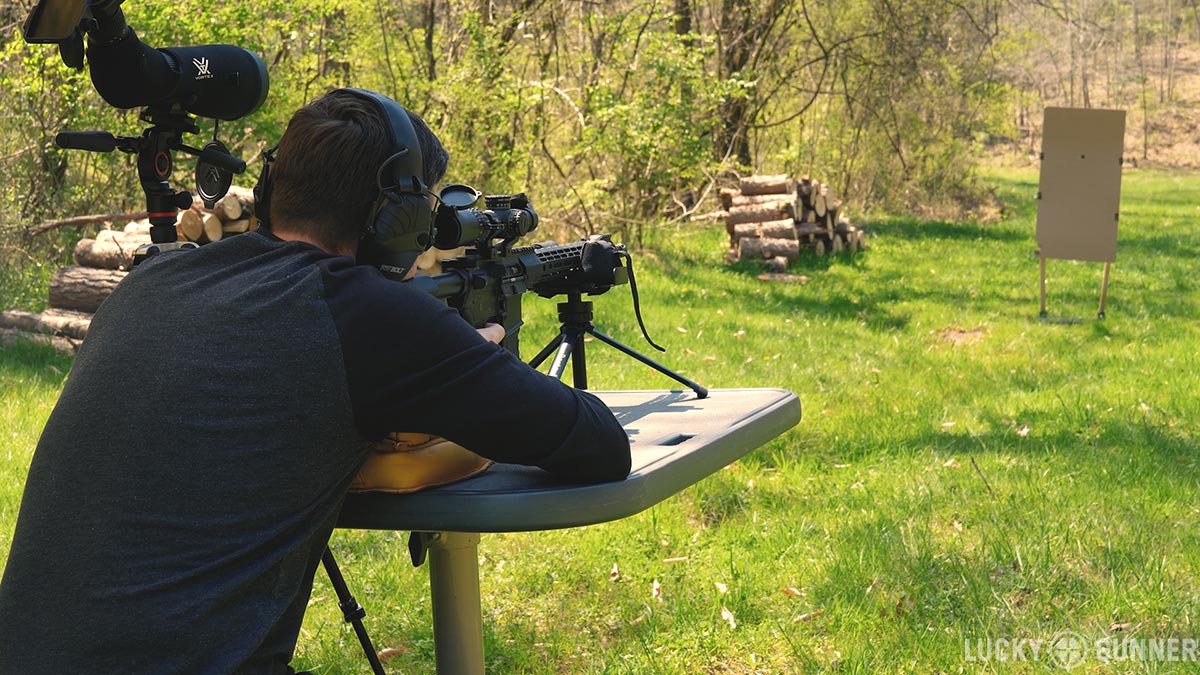
For my 100-yard sight-in, I’m going to switch over to my match ammo. I’m shooting from the bench because I want to remove as much potential for human error as possible. If you don’t have an actual bench rest of some kind, just get the most stable position you can. That could be a table with a backpack on it. Or just a nice solid prone position.
I’m also going to use a different target. I like to use a grid target so I can easily tell exactly how far off the bullseye my shots are. Today, I’m really cheating, because I printed out these ½” grid targets, which corresponds to the ½ MOA per click adjustments on my scope. The grid is even labeled to tell me exactly what adjustments I would need to make. This should be fairly accurate as long as I’m sighting in at 100 yards.
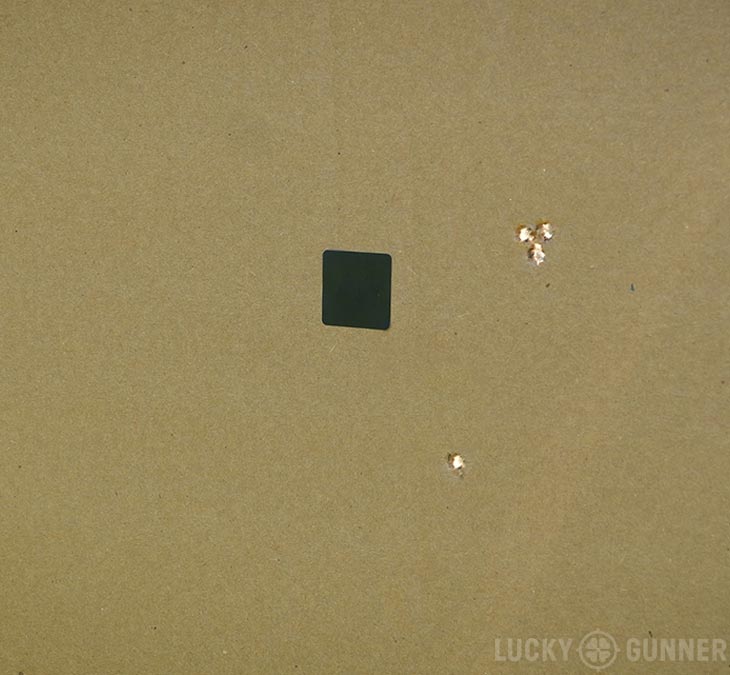
Just like with my rough zero, I’m going to start out with a three-round group. I’ve got a few targets already set up and my spotting scope, so I don’t have to go back and forth to measure and paste my targets.
Hopefully I get a nice group somewhere on the paper, or at least on the cardboard. If I don’t get a very tight group, I need to troubleshoot what else might be going on before I continue trying to sight in the optic. If my mounts are loose, if my bench is unstable, if I’m having a bad day on the trigger, then there’s no sense in trying to zero. I have to get a consistent group first.
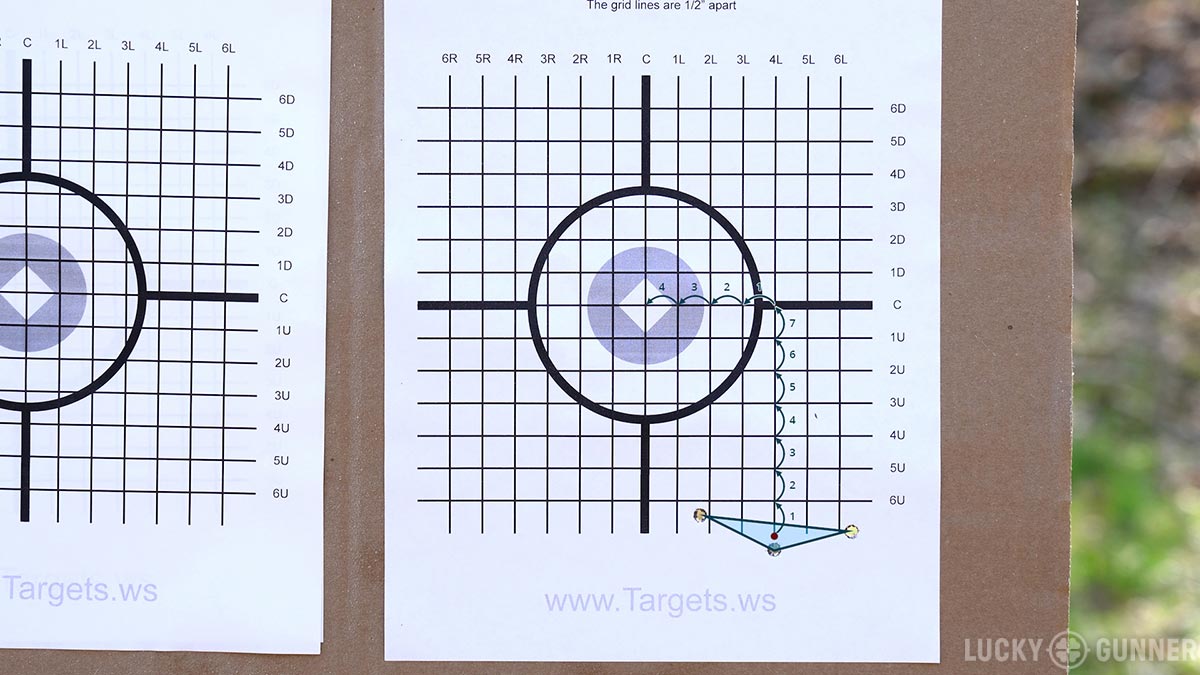
Based on what I’m seeing in my spotting scope, I’ve got a halfway decent group. It’s a little over two inches, which is not bad. I’ll start by finding the center of that group. It looks like that middle shot is very close to the center point of the group. Based on that position, I’m going to adjust my optic. It looks like I need to come seven clicks up and four clicks to the left. That should put me close to the middle.
So, on my top turret, I’m going to go up 1-2-3-4-5-6-7. And left 1-2-3-4-5-6-7…
Oops!
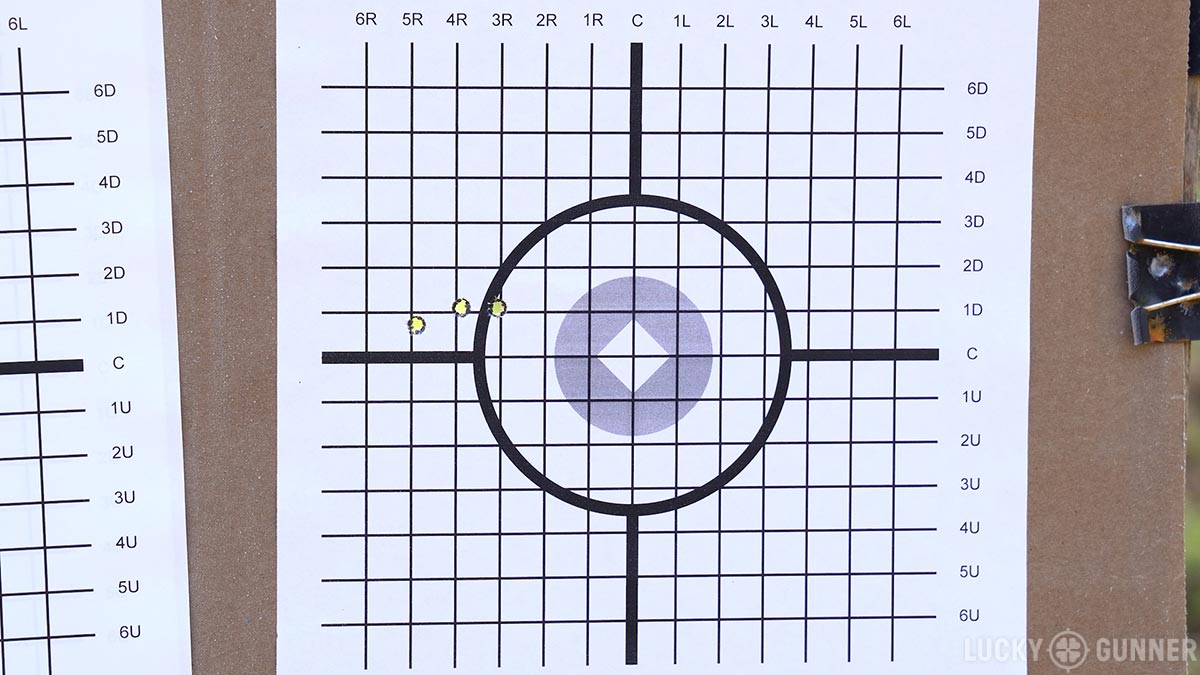
Hey guys, Chris from the present here. I don’t know if you caught my brain fart just then. The target was telling me I needed to go left four clicks and I even said I needed to go left four clicks. But when I actually adjusted the scope, I went left seven clicks. We didn’t catch that until I started editing the video.
As you’ll see in a minute, that put my next group to the left of the bullseye. At the time, I just assumed that was either because of some inconsistency with the ammo or because the click adjustments on the scope were not quite accurate. That’s something that happens sometimes.
Actually, based on where that next group ended up, it would have been pretty much dead center if I had only done four clicks instead of seven. So blame this one on me, not Swamp Fox. Their scope seems to be pretty solid so far.
But I’m going to go ahead and play the rest of the sighting-in process as we filmed it with that mistake in there. The reality is that getting your group dead center after the first adjustment doesn’t happen as often as we would like. Even if you do the math right and you don’t miscount clicks, there are a multitude of reasons why things might not line up just right on your first try.
The way I ended up handling it here, I think, is a pretty good rule of thumb. If your math doesn’t seem to be working out the way it should, be conservative with your adjustments, and don’t burn too many rounds chasing perfection. Okay, back to the video.
Fine Tuning
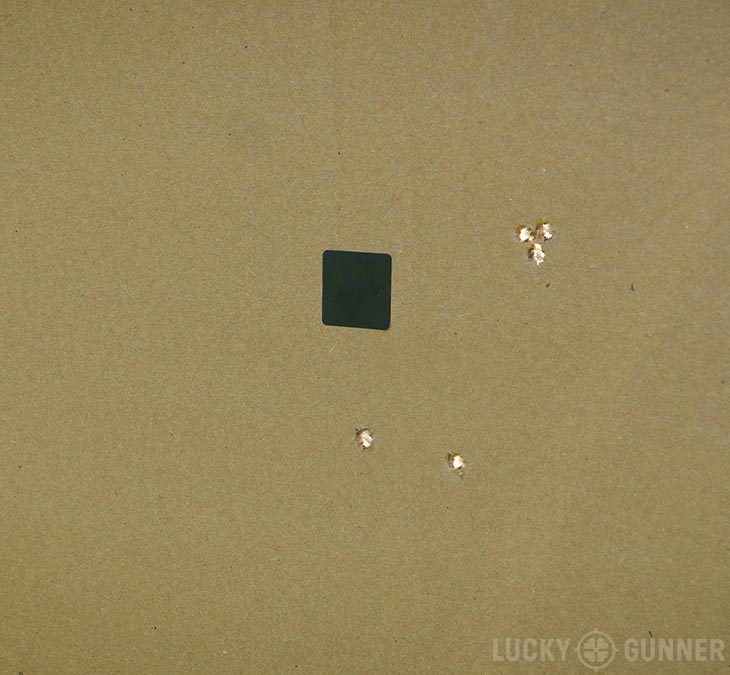
Now I’m going to shoot another three-round group. Hopefully, it will be closer to the center and we’ll be working our way toward and actual zero.
Okay, so that group looks pretty good. It’s about an inch. Our elevation is pretty close to where we want it. It’s not exactly in the middle, but I’m within a half an inch. I’m not going to try to get it perfectly in the center. You could chase that all day and never quite get there. This is not a precision rifle and I’m not trying to get dead center with my zero — that’s close enough for me.
Now, my windage is still off a little bit. I went four clicks left and that actually took me to the left of the bullseye. So, instead of going back to the right the number of clicks the target is indicating, I’m just going to go back half my previous adjustment. So I went four to the left, I’m going to two clicks back to the right.
Let’s see where that puts us. Hopefully, it will be right in the middle.
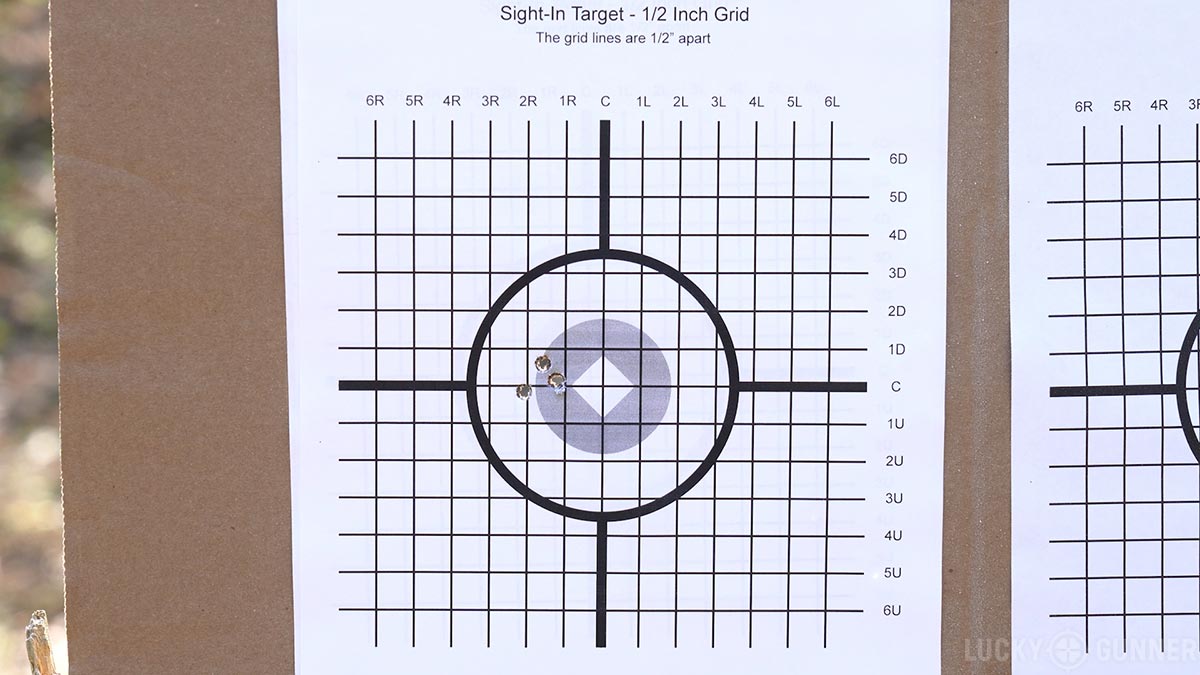
It looks like we got another nice little group there. I am still just a hair to the left. But I’m not going to touch it. I feel pretty good about where it is right now. Before making any more adjustments, I would wait until I shot more groups farther back, like at 200 or 300 yards. If I’m still to the left, then I might come over another click. But you don’t want to waste a bunch of ammo chasing it and trying to get that perfect group at 100 yards. Even if you get there, you might have to adjust it again anyway if you increase the distance. So for a 100-yard zero, I’m pretty happy with that. It’s close enough to the center for me.
I’m more or less done with my initial sighting in at this point. If I want the rifle to be zeroed for 200 (which is what I typically prefer for a 5.56 AR-15), I’ve got a good starting point for that. It wouldn’t hurt for me to shoot one more group at 100 just to confirm that I have a good zero.
Guys, I hope you found that helpful, if so, if you wouldn’t mind, subscribe to our email newsletter if you haven’t already. I really appreciate it!