


We’re back with another episode of Start Shooting Better. In this series, I’m joined by John Johnston of Ballistic Radio to help explain some drills and tests you can try at the range to help improve your shooting ability.
The drill we’re looking at this time is the 5×5 Drill (aka the 5^5 Drill). I’ve actually covered this one before in a blog post a couple of years ago, but I think it’s worth revisiting because it’s really useful for assessing your basic skill level with a handgun. As Greg Ellifritz put it, if you can pass this drill, “consider it like you’ve achieved a high school diploma in gunfighting. Realize that there is a whole world of higher education beyond high school.”
The video embedded below has the details of the drill, or you can scroll down for the full video transcript as well as a link to download a printable version of the 5×5 target.
One quick side note: There is another pistol drill known as the “5×5 Skills Test” developed by Bill Wilson. That one is also a great drill to try, but it’s completely different from the 5×5 Drill we’re doing here. Details on the Wilson 5×5 Skills Test can be found here.
Download Printable 5×5 Drill Target (PDF)
CHRIS: Hey, guys. Chris here from LuckyGunner.com. I’m here again with John Johnston from Citizens Defense Research and the host of Ballistic Radio. We’re going to do another drill today, and this time we are looking at one of my favorites: the 5×5 drill. So John, why don’t you go ahead and explain what that looks like.
JOHN: The 5×5 drill originated with Gila Hayes in her book, and then Claude Werner adapted it and added some repetitions. What we’re doing is we’re taking a five-inch circle. We’re going to fire five rounds in a time of five seconds at five yards. We do that six times. The first time is just to see where our sights are hitting. And we do it five more times to see if it’s repeatable performance or if we just got lucky.
CHRIS: So what’s considered a pass for this drill?
JOHN: All five rounds inside the 5-inch circle under five seconds.
CHRIS: All right. Well, let’s give it a shot.
CHRIS (VOICE OVER): We’ve got a link to a printable version of the 5×5 target that has two five-inch circles with center-aiming dots and the instructions for shooting the drill. You can print out three of these to shoot the drill or you can make your own targets.
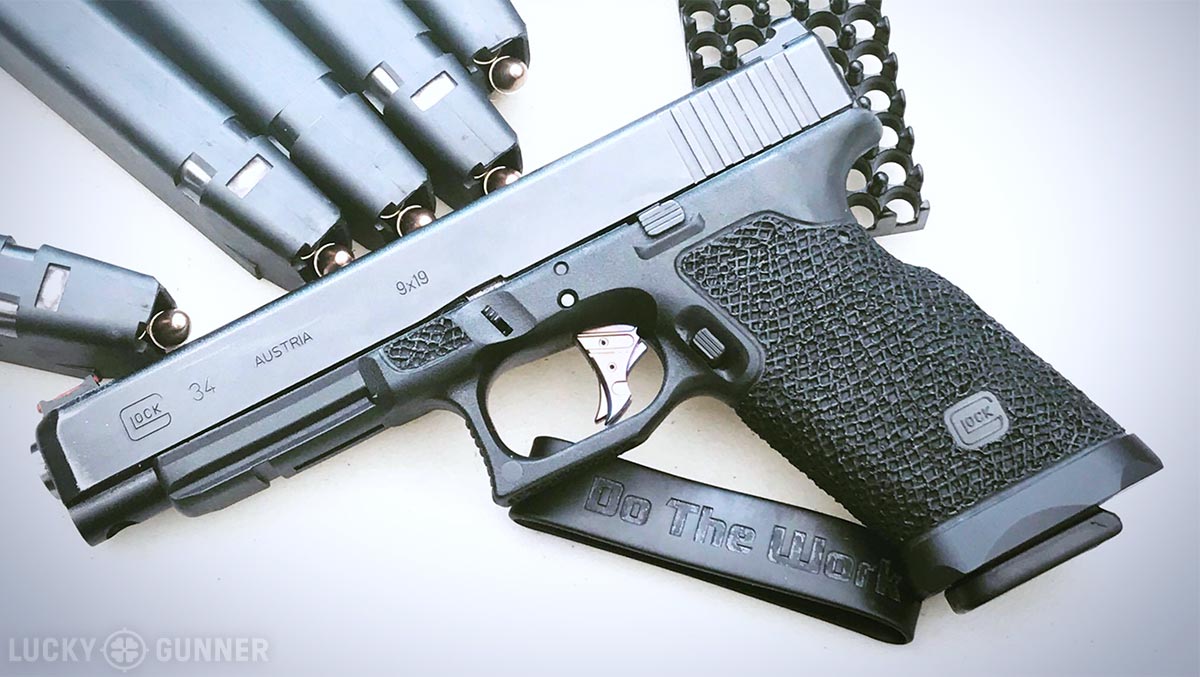
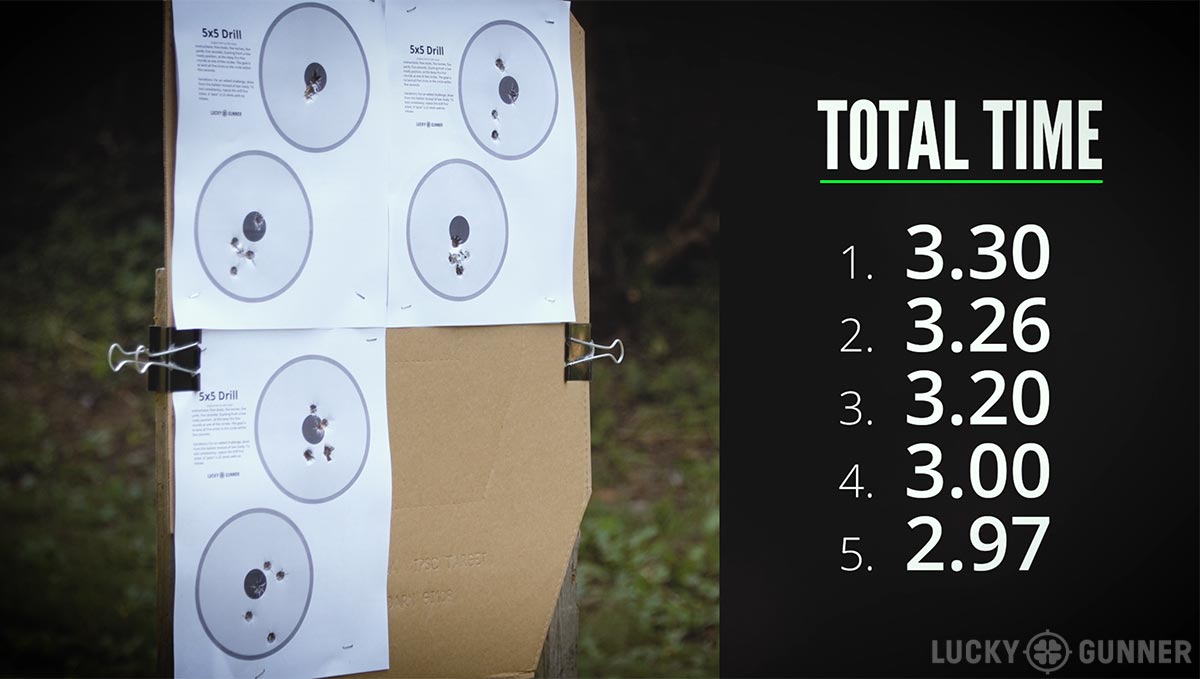
John is going to be shooting this with his Glock 34 customized by Boresight Solutions. This is John’s carry gun and he’s pretty comfortable with it, so he’s going to do the more challenging version of the drill and run it from the holster.
The first five shots are done with no time limit, shooting as tight a group as possible to confirm that the sights are aligned correctly. After that, shoot it five more times with a five-second time limit. You can use a shot timer, or if you don’t have one, you might try a stopwatch app on your smartphone.
The 5×5 drill is a great way to test whether you have achieved a basic level of competence with handgun marksmanship fundamentals. It can also be used as a way to determine whether you are able to shoot a specific gun well enough to rely on it for defensive purposes.
It looks like John has passed this with no trouble at all. He kept all his shots inside the circles, and he was well under the five-second time limit on each repetition.
I’m trying the drill with a Smith and Wesson 342PD, which is an 11-ounce .38 Special. These super-lightweight snub-nose revolvers can be pretty challenging to shoot, and I actually have never fired this one before today. I’m going to run it from the low ready position using wadcutter loads, which is what I would typically carry in a gun this light. It looks like the sights are aligned to the bullet’s point of impact, so I don’t need to make any adjustments for the timed groups.
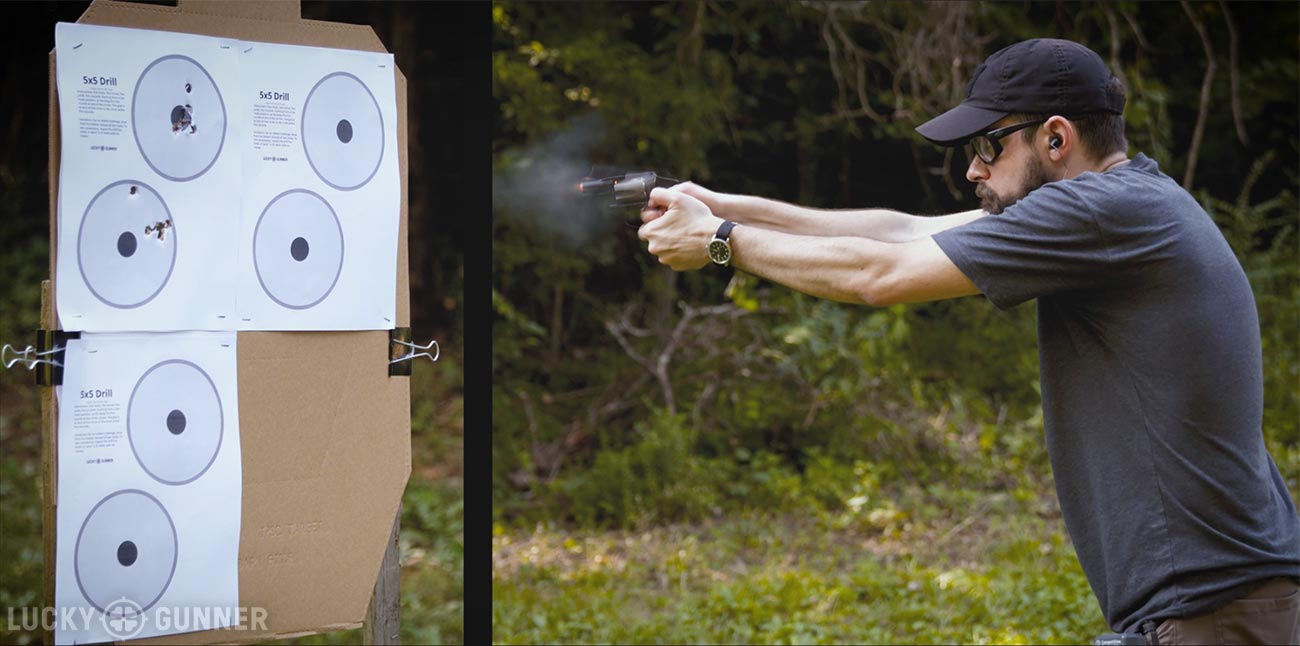
Even if you’re able to pass the 5×5 drill with a full-size pistol, it could prove to be more of a challenge with a smaller gun that you might be more likely to actually carry. Trigger control and recoil management both require a lot more attention with the kind of small revolvers and semi-autos that a lot of people like to carry.
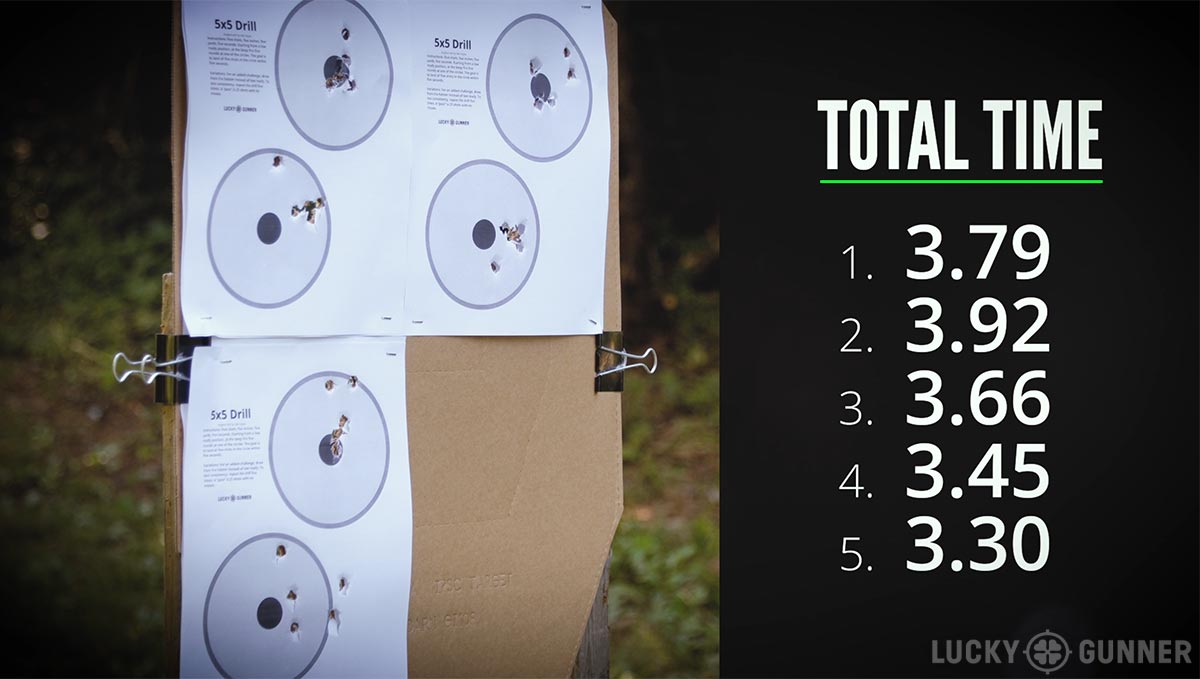
Okay, my focus wandered a little and I pulled my last two shots to the right. So I did not pass the 5×5 drill this time. But overall I feel pretty good about how I did. I’ll put a few more boxes of ammo through this revolver to get accustomed to it, and I should be able to come back and clean the drill next time.
CHRIS (TO JOHN): So if I try this drill and I’m way over the time limit or I’m just dropping shots all over the place, what should I do about that? Should I just keep trying the drill until I can get it right? Or what’s a way to approach it?
JOHN: You could try it that way. It really depends on how you’re not meeting the standard. So if you’re making the time limit, but you’re dropping shots, then you need to work on your trigger control, especially at speed. If you’re making the accuracy standard but you’re not making the time standard, you need to work on your recoil management. You need to work on not over-confirming the sights. Unfortunately it’s one of those things, especially as you’re practicing on your own– you need to get good at diagnosing where you’re falling down.
CHRIS: All right, well that’s the 5×5 drill. Print out some targets or you can use a CD and just trace around the target to get a five-inch circle. Get out to the range and give it a shot.
JOHN: Yep. Just make sure that you put that center-aiming point, because if you don’t it gets a lot harder.
CHRIS: Good point.