

This installment of our Shooting 101 series is a tutorial covering the basic operation of the AR-15 rifle for the complete novice. We cover procedures for safely loading, unloading, and firing the AR-15, as well as all the basic controls on the rifle.
Full details are in the video below, or scroll down to read the full transcript.
Hey guys, I am Chris Baker from Lucky Gunner and today we’re going to talk about how to use an AR-15. This is an updated version of the original video we posted back in 2017.
If you’re new to guns in general, or just new to the AR-15, I’m going to show you the basics of how to safely load, unload, and fire an AR. No video can take the place of real, in-person training from a qualified instructor, but this should help get you going in the right direction.
Rules for Safe Gun Handling
Before we get into the specifics, we need to start out with a few guidelines for safety. Safe is a relative term. Anything we do with firearms is inherently dangerous. Every time you pick up a gun, you are making life and death decisions, whether or not you realize it. We can reduce that risk by following the four basic rules of safe gun handling. There are different ways to phrase these rules, but they usually go something like this:
- Treat all guns the same way you would treat a loaded gun.
You cannot ignore the other three rules just because you believe a gun is unloaded. - Always keep the gun pointed in a safe direction.
That means, if it were to fire, it’s not going to hurt anyone who doesn’t need to be hurt and it’s not going to damage anything you can’t afford to replace. - Keep your finger away from the trigger until you are ready to shoot something.
Pretty straightforward, but that’s the one people seem to have the most trouble remembering. Anytime we’re holding the gun but we are not actively aiming at a target and preparing to fire, we need to have our trigger finger straight and glued to the side of the receiver. We don’t just want our finger off the trigger, we want it as far away from the trigger as we can reasonably get it - Know what it is you are shooting at and what is behind it.
That goes for the shooting range or anywhere else you might need to use your gun.
There’s a lot more to using a gun safely than just these four guidelines, but if you follow them, you greatly reduce your chance of unintentionally hurting yourself or someone else.
How to Clear an AR-15
There are several different methods for doing just about everything I’m about to show you. My goal isn’t to cover them all, I just want to help you grasp the absolute basics.
Whenever we handle an AR-15, or any gun, the first thing we need to do is clear it. That means we’re going to check and see if it’s loaded, and if it is, we will unload it.
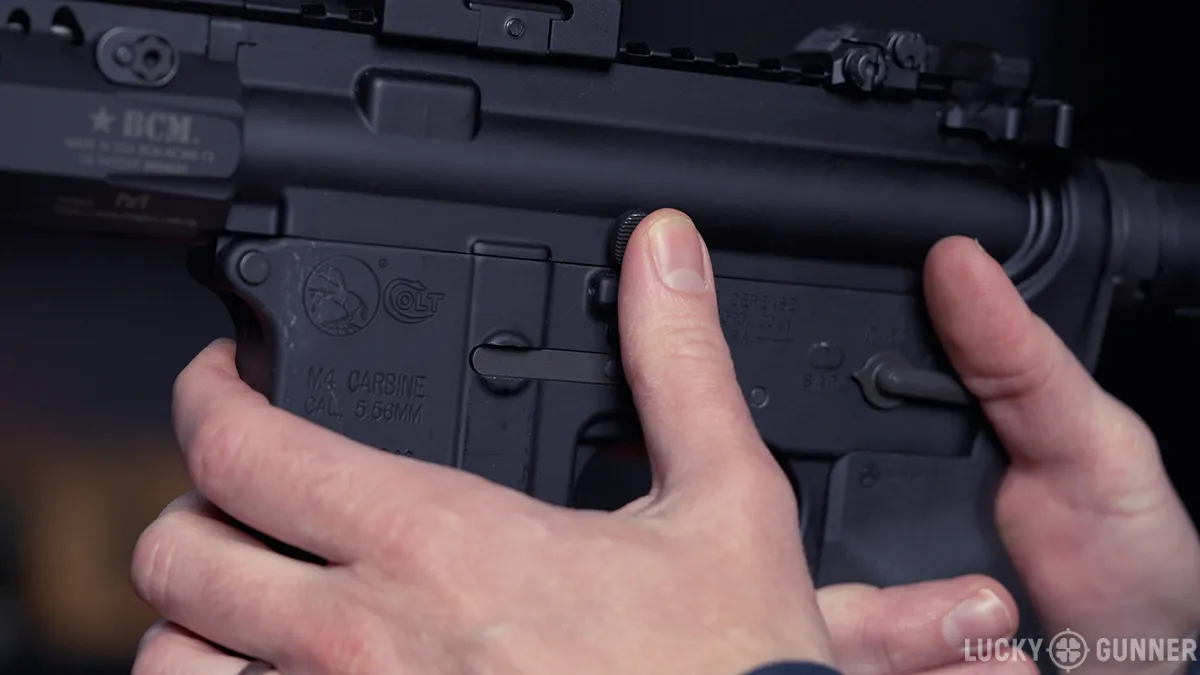
The first step is to remove the magazine. The magazine release is here on the right side of the rifle. Some rifles have an additional button on the left side, but most don’t. Just push that in and the magazine will drop free.
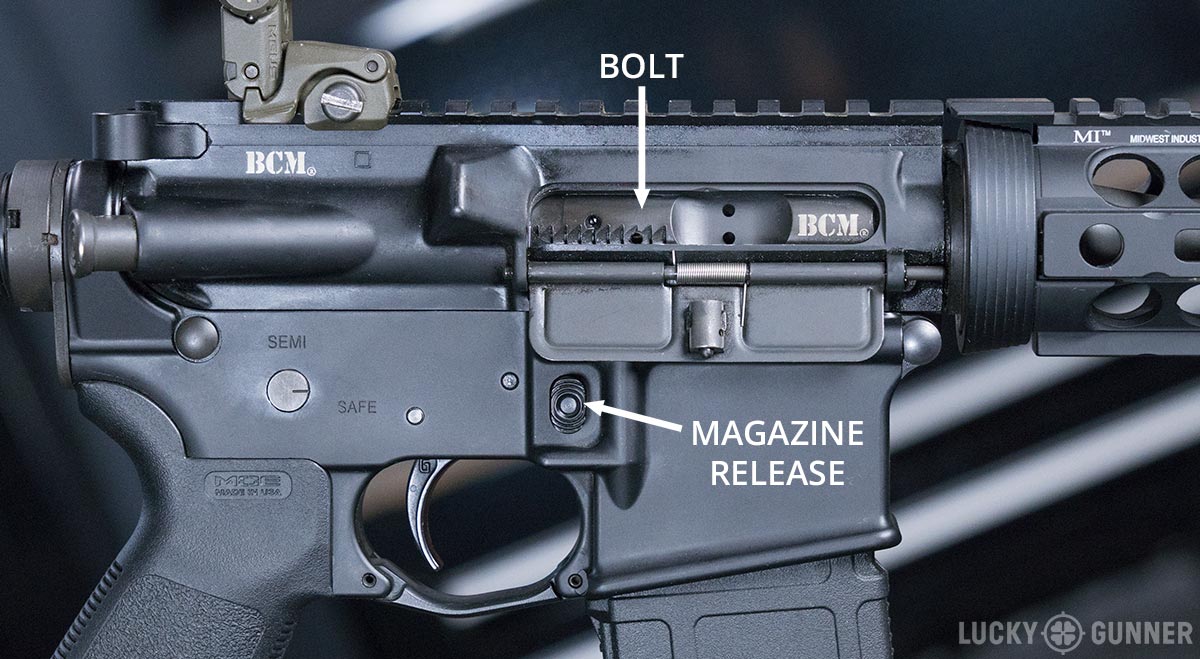
Set that aside, and now you need to open the bolt so you can see if there’s a round in the chamber. The bolt is this thing here that moves back and forth when the gun is fired. If you don’t see it, it might be because the ejection port cover is closed. That’s just to keep dirt and debris out of the inside of the gun. It will open automatically when you open the bolt.
To do that, sharply pull the charging handle to the rear as far as it will go. On a standard AR, pull the left side of the handle unless you’ve got a fancy ambidextrous handle, then you can pull either side.
If there’s a round in the chamber, it should come out when you do this. But you still need to get a look in the chamber to make sure there’s nothing in there, so you need to lock the bolt open.
This next part is a little awkward. It’s the most complicated manipulation we’re going to cover and then it gets a lot easier. Over here on the left side of the gun, you have the bolt catch, also called the bolt release. Push in the lower portion of the bolt catch and hold it down.

While you’re holding it down, pull back the charging handle. Now the bolt will be locked open and the charging handle will be loose. Push that back in until it locks into place.
It’s actually a little less awkward to do this the left handed way. If you hold the grip in your left hand, you can press and hold the bolt catch with your index finger. Then use two fingers to pull the charging handle.
With the bolt locked open, get a good look inside the chamber (which is just the technical name for the part of the barrel where the ammo goes). We want to see an empty chamber like this [left in the photo below], but if there’s a round still in there for some reason, it’ll look like this [right photo]. That round should have ejected when you opened the bolt. If it didn’t, your gun might be broken and you need to involve someone who knows what they’re doing.
![]()
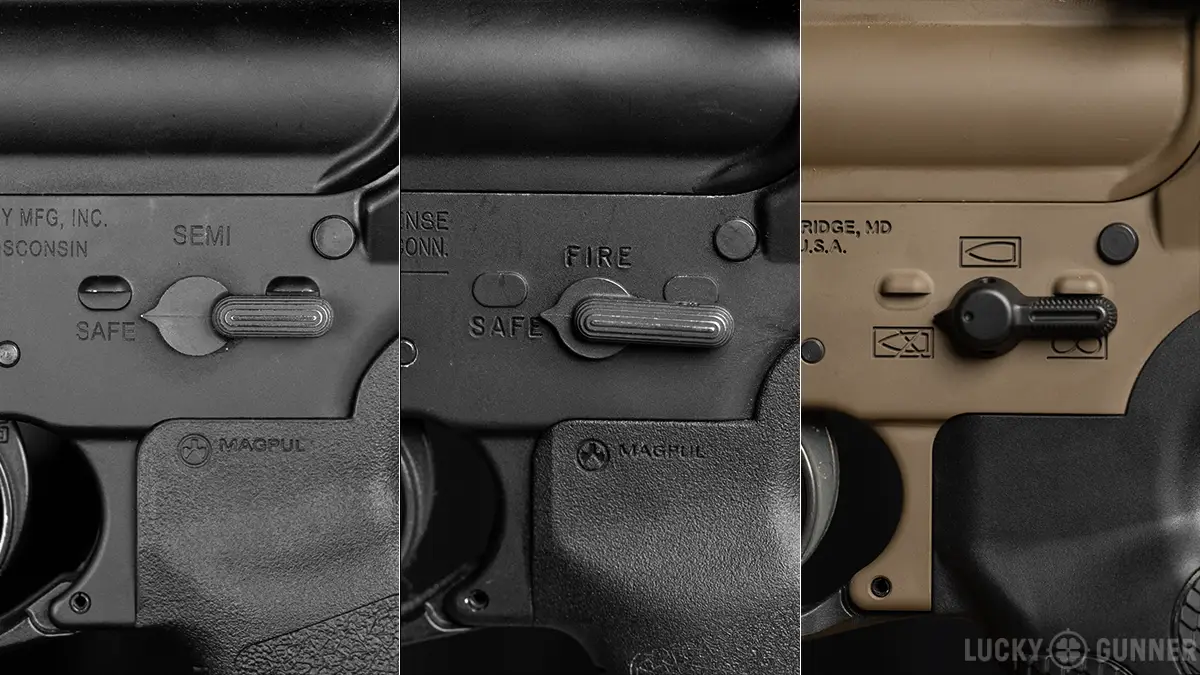
On the left side of the gun above the grip you will find the safety selector. Again, sometimes it’s on both sides of the gun, but usually just on the left. On most ARs, there will be two options: safe and fire, or something similar. Move the safety selector so the pointy bit is on “safe,” if it’s not already.
How to Load an AR-15
Now that you have cleared the gun, you can do whatever else you need to do with it like clean it, or put it away. If I was going to store it, I would close the bolt first. But in this case, I’m going to load it. So I’ll leave the bolt locked open and put the gun down with the barrel pointed in a safe direction. Keep the ejection port facing up (that’s this opening here), so everyone else at the range can see that the rifle is unloaded.
Next, you’re going to load the magazine. Brace the bottom against a hard, flat surface. This wedge-shaped portion of the follower will point in the same direction the bullets need to be pointing. The rounds will sit on top of each other in a staggered pattern, so one round will sit on the left side of the mag, the next round will sit on the right side, and so on.
I suggest you not fill the magazines to full capacity. For example, I usually load just 28 rounds in a 30-round magazine. I’ll talk about why in just a minute.
Once you’ve loaded however many rounds you want to shoot, pick up the rifle with your firing hand on the grip. Take a quick look at the safety selector and make sure it’s still on safe. Pick up the magazine and insert it into the mag well until it clicks. Give it a little tug to make sure it’s firmly seated in place. If you skip this step and it’s not all the way in there, your mag might fall out while you’re shooting and you’ll feel silly and that’s no good. Once you’ve ensured the mag is fully seated, press the top portion of the bolt catch to close the bolt and chamber a round.
When the bolt closes, it picks up a round from the magazine and loads it into the chamber. If I take a magazine with just one round in it and load it, and then remove the magazine, you can see the round is gone because it’s now in here. It can fire now if, even without the magazine because it fires the round that’s in the chamber.
The loading procedure looks a little different if the bolt is already closed before you insert the magazine. In this case, insert the mag and make sure it’s seated. It might be a little harder to get it to seat when the bolt is closed, and that’s why you don’t necessarily want a fully loaded mag. When the magazine spring is fully compressed, sometimes it doesn’t like to go all the way in there. That varies a lot from one magazine to the next. Some are fine fully loaded, but lots of them do better with one or two rounds less than full capacity.
Okay, so my mag is in there, but the gun is not ready to fire yet. There’s no round in the chamber. So you just pull the charging handle to the rear and release it. Don’t ease it forward, let go of it completely so the spring and bolt can do all the work.
The Forward Assist
So at this point, the gun is loaded and it will fire if I disengage the safety and press the trigger. But we’re not quite ready for that, so keep the safety on and your finger away from the trigger for now.
There’s one other control on the rifle that we haven’t talked about and that’s the forward assist. The only time you’d ever use the forward assist is if the bolt doesn’t go all the way forward for some reason. You can tap the forward assist and it will force the bolt into place.
Sometimes hunters use this if they’re loading the rifle in the field and want to close the bolt slowly and quietly. Otherwise, it’s debatable whether this is actually all that useful in reality. Some ARs don’t even have a forward assist and you will probably never need to use it, but now at least you know what it’s for.
How to Fire an AR-15
Stance and Grip
Let’s talk about firing the rifle. I have cleared it for now, but let’s pretend I’m ready to shoot.
The best stance and grip to use are dependent on the type of shooting you’re doing. I’m going to give you a quick overview of a kind of general purpose technique.
Don’t over-think the stance too much. Just get into an athletic-type posture with feet shoulder-width apart, your knees slightly bent. Lean forward at the waist a little so your weight is on the balls of your feet.
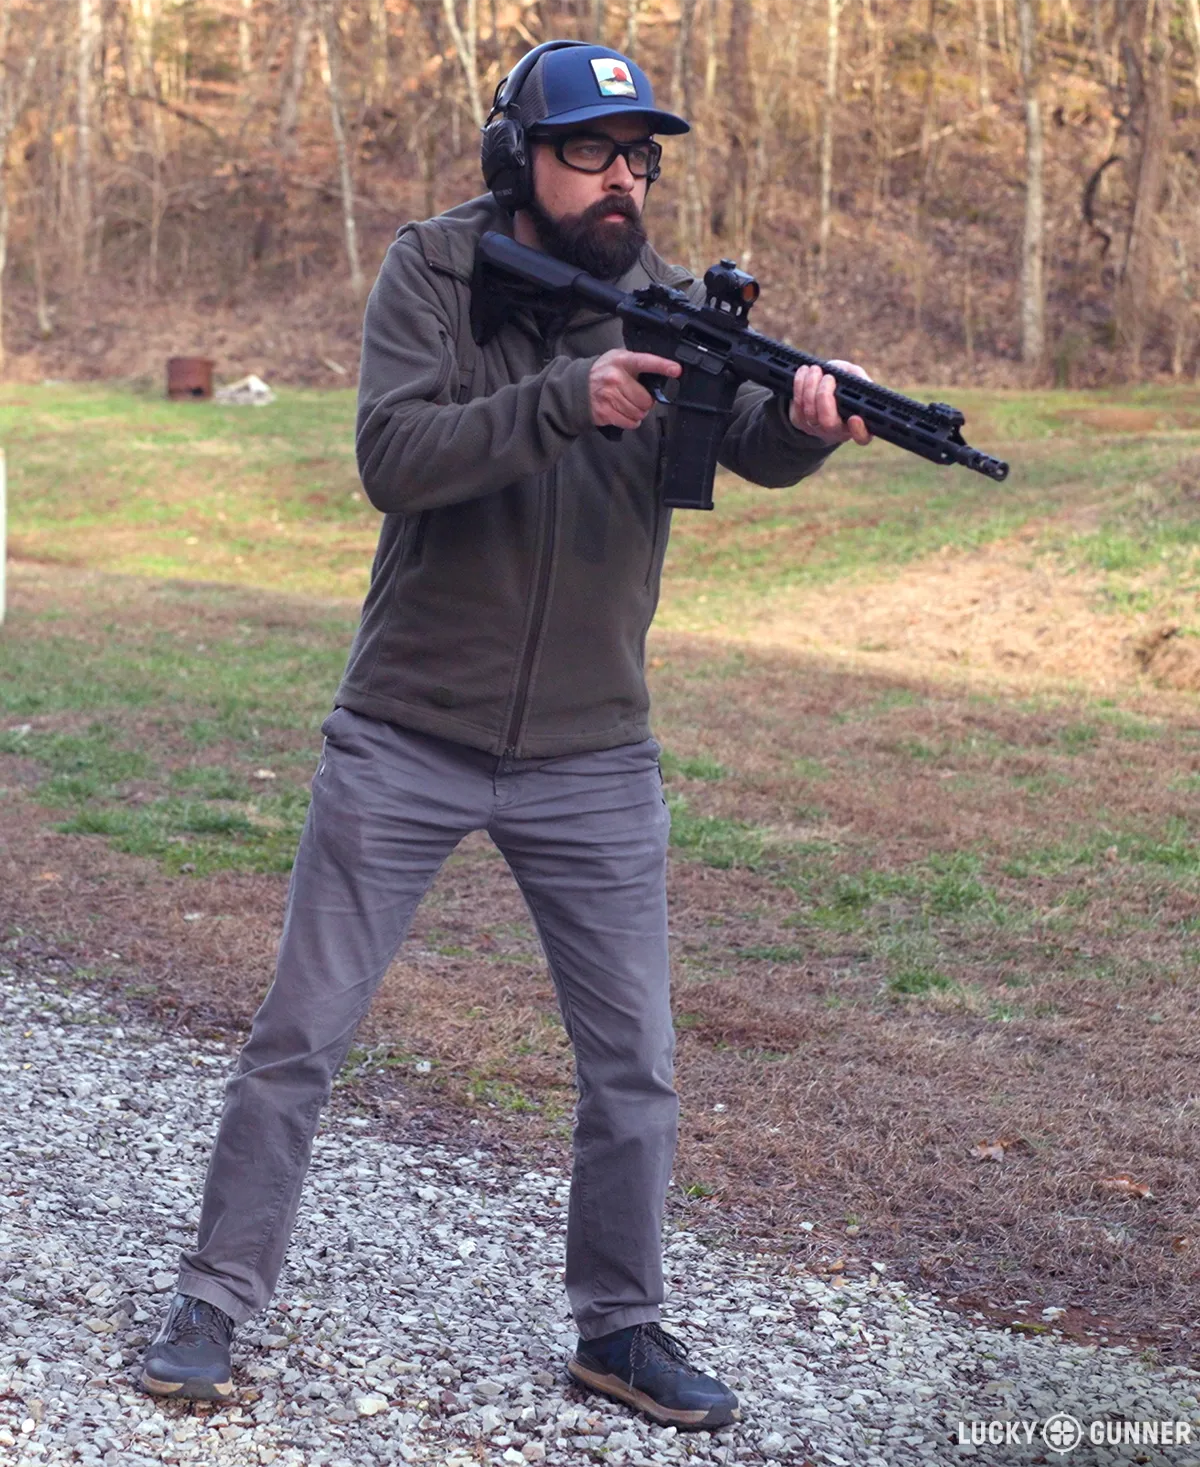
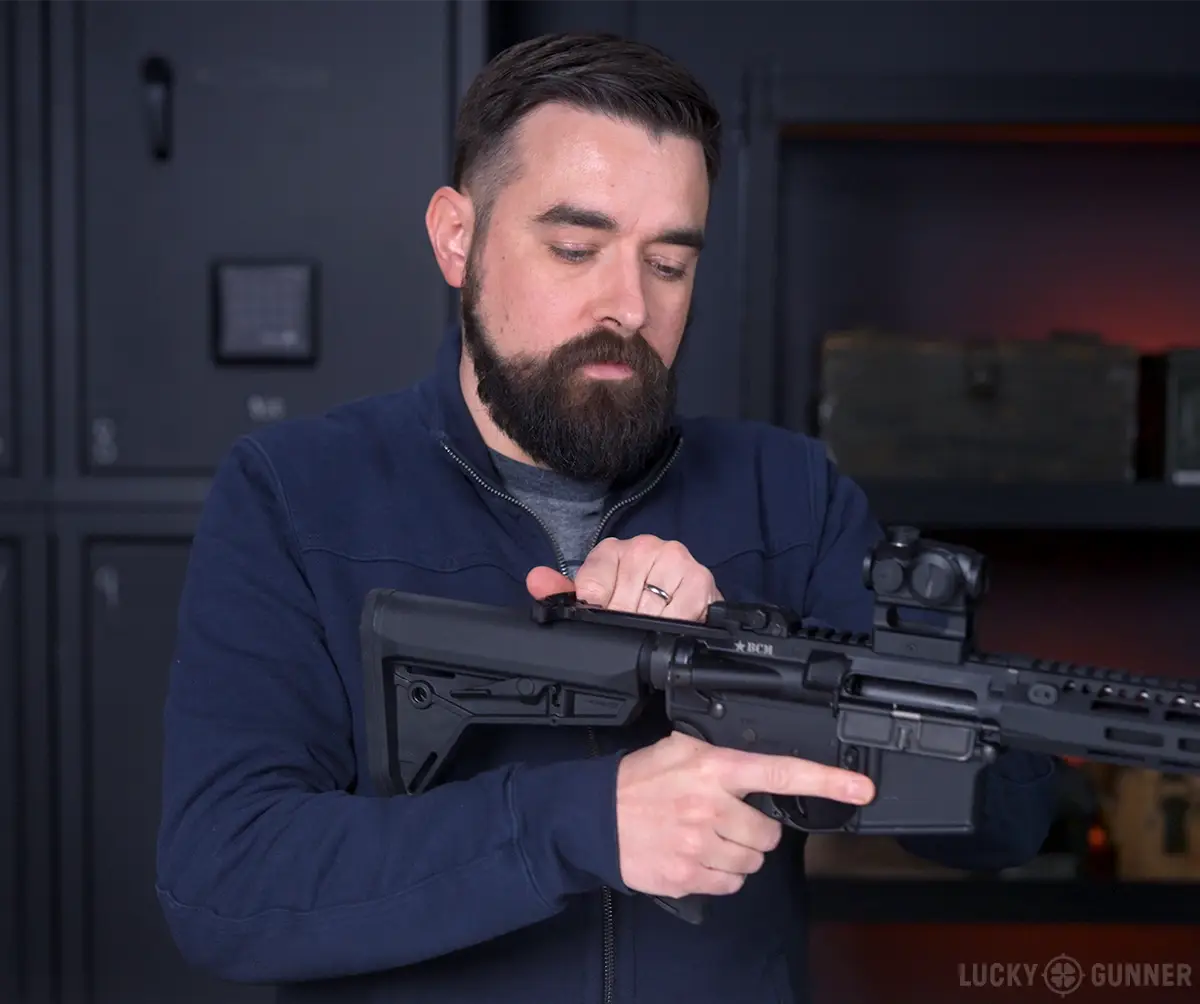
Put your firing hand as high up on the grip as you can get it. Keep your index finger straight and up here well away from the trigger. If you’re right handed, put your thumb beneath the safety. Keep your elbow pointed at the ground and not out like this. Place the stock in here, off of your actual shoulder and more on the edge of your pectoral muscle. Most ARs have an adjustable length stock. If you’re average height or taller, you should probably just extend that all the way out. Shorter people might try bringing it in one or two clicks. You just have to experiment with it.
Now, grab the handguard with your support hand. I like to get my arm out not quite to full extension so I have good control over where I’m pointing the gun. There are different ways to hold it, though. Again, don’t worry too much about that at this point.
With the stock still on your shoulder, pivot the gun down so it’s pointed at the ground just in front of the target. This is the low ready position, and it’s the default position you use at the firing line when you’re not actually shooting. When it’s time to shoot, bring the gun up to eye level and get your cheek planted firmly against the stock. As much as possible, move the gun to your face, don’t move your face to the gun. You don’t want to lean your head over to one side. If you need to, shrug your shoulder a bit to bring the gun up to eye level.
Sight Alignment
Now, I have to take a quick detour to talk about how to use sights and optics. These days, most shooters put some kind of optic on their AR – either an electronic dot sight or a magnified scope. Any of those options are fine. Simple red or green dot sights are the most straightforward to use and they allow beginners to focus on the other basics of shooting.
With the dot sights, you just look through the glass at your target. Line up the dot with the center of the target, and that’s all there is to it.

The sight will wobble around a little bit and that’s okay. You won’t be able to hold it perfectly still when you’re shooting from a standing position. Just try to keep the wobble as close to the center of the target as you can.
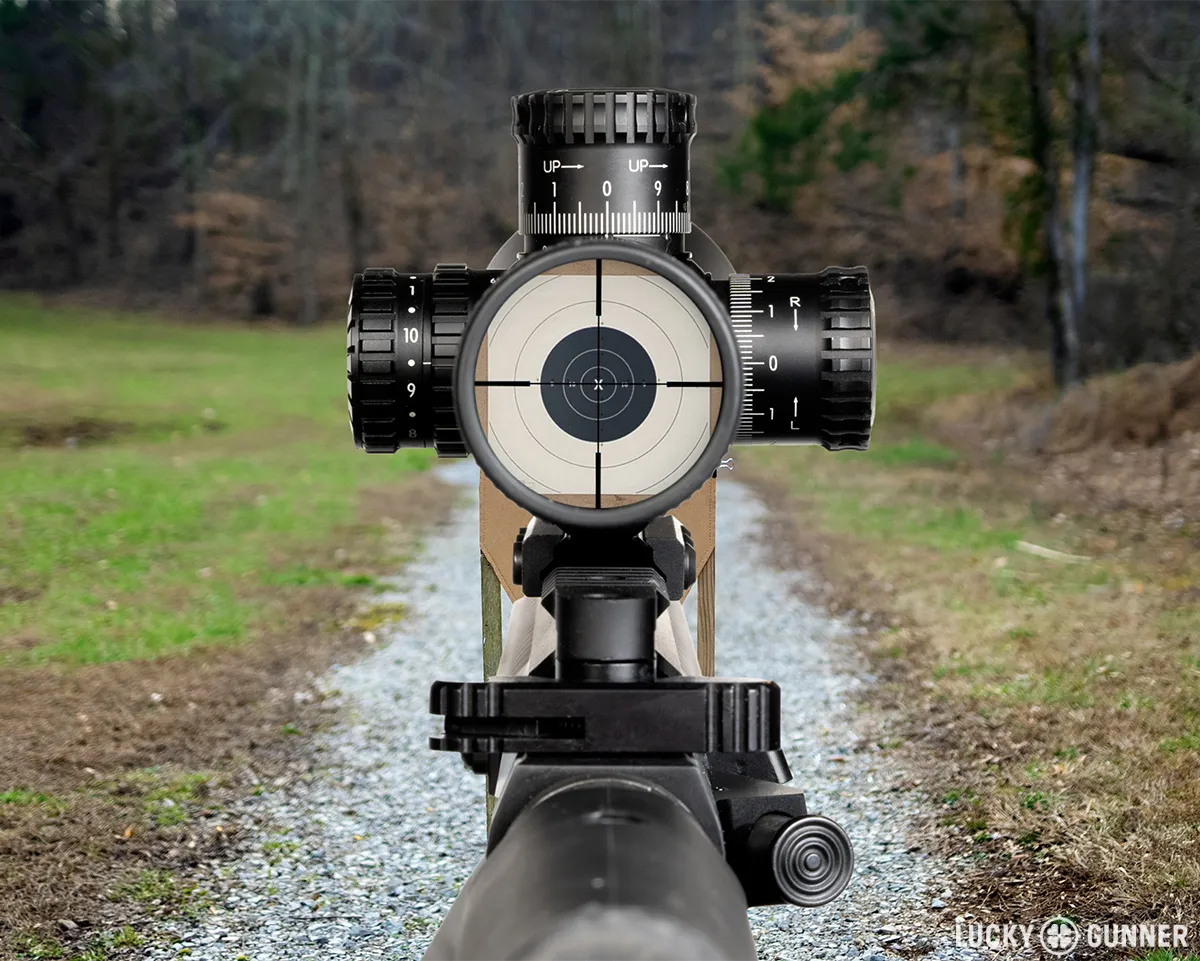
A more traditional magnified scope with crosshairs works the same way. Line up the center of the crosshairs with the center of the target.
If you don’t have an optic, then hopefully your rifle is equipped with a set of iron sights. Iron sights aren’t actually made of iron, that’s just the term for any kind of traditional sighting system where you have a front and a rear sight you have to line up. Iron sights on ARs are usually the aperture style, also called peep sights. The rear sight is a hole you look through and the front sight is a post. Iron sights on ARs originally looked like this, but today they’re usually the flip up style. If that’s what you have, make sure your sights are flipped up before you try to use them.
Look through the hole in the rear sight, at the front sight post. You will probably have to close one eye to do this. Line everything up so the top of the front sight post is right in the center of the target. Unless the target is really close, you generally want your vision focused on the front sight.

Whether you are using iron sights or an optic, you might have to make some adjustments to that sighting system so that the spot you’re aiming at is the same as the spot the bullets are going. This process is called sighting-in or zeroing the rifle and I’ve got a whole separate video on that topic. Just be aware that if you bought your gun new or you just installed the optic yourself, it will probably need to be sighted in before you can hit what you’re aiming at.
One more note about optics. Some rifles have an optic and iron sights. You don’t use both at the same time. When I’m using my red dot, I ignore the iron sights. That’s why they fold out of the way. You never have to line up the dot with the irons. The irons are there to use as a backup in case the optic fails for some reason.
Firing the Rifle
Okay, so back to shooting the rifle. When the gun is pointed at the target, you can disengage the safety. Use your thumb if you’re right handed, or if you’re left handed, use the knuckle of your trigger finger. And now finally, you can move your finger to the trigger. Press the trigger to the rear with steady even pressure and… bang. Congratulations, you’ve just put a hole in… something.
The gun will be extremely loud when it fires. Good hearing protection is absolutely essential. However, most AR-style rifles do not have a lot of recoil, so it’s not going to beat up your shoulder or knock you down or anything. After the gun fires, in the blink of an eye, the bolt will move to the rear, a spent shell casing will fly out of the ejection port, and a new round will be loaded into the chamber. Press the trigger again to fire another round, and you can keep doing that until you run out of ammo or you decide to stop shooting. In either case, anytime you stop shooting, take your finger off the trigger, flip the safety to the safe position, and go back to low ready.
If the gun is empty, the bolt will lock open on the last shot. Remove the empty magazine and either insert a new mag, or table the rifle with the bolt open and the muzzle pointed in a safe direction.
Summary and Live Fire Demo
That was a lot to cover, so let’s put it all together with a quick live-fire demonstration.
First, clear the gun. Remove the magazine, lock the bolt open and check the chamber. Make sure the safety is on. Put down the gun and load the magazine.
Once the mag is loaded, double check that the safety is engaged. Insert the magazine and press the bolt catch to close the bolt and chamber a round.
From the low ready position, raise the gun to eye level, aim, safety off and press the trigger. When you stop firing, finger off trigger, safety on, and down to low ready. When the gun is empty, remove the magazine and load another one or table the rifle.
[Note: The video embedded below is an excerpt from the full video, showing only the live fire demo.]
There’s a lot of stuff I did not cover in this video. This is just a quick overview of the basics. I hope you found it helpful. Again, I highly recommend getting some training in person from a qualified instructor. And I also suggest that when you need some ammo for your AR-15, you get it from us with lightning fast shipping at Lucky Gunner.